
This guide is suitable for NetComm NP803n routers.
What we'll cover:
- Connecting cables
- Logging into your router
- Setting up your Fibre Estates Fibre to the Premises (FTTP) connection
- Configuring your WiFi network
Not what you're looking for? Try the NetComm NP803n WiFi guide.
Internode delivers all new hardware with your username, password, and other settings pre-loaded. If you've just received your router from Internode, simply follow the cabling guide, then test your connection.
If you purchased your router elsewhere, or performed a factory reset, you will need to follow all steps in this guide.
NetComm NP803n Cable Setup
Connection of your router will vary depending on the type of service you have. This guide is designed for configuring Fibre to the Premises (FTTP) services, but includes extra information for alternate setup types.
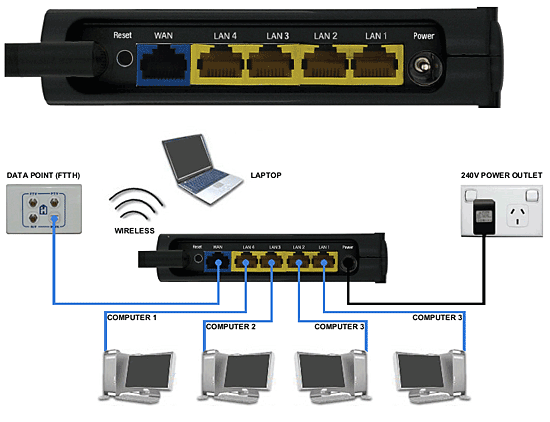 |
| Figure 1: Example cabling for NetComm NP803n |
Cabling for Standard Fibre to the Premises connections
- Use your supplied Ethernet cable to connect the WAN port on the router to the Data port on your FTTP wall outlet.
- Connect another RJ45 Ethernet Cable to one of the LAN ports on the back of the router. Connect the other end of the cable to your computer's network port.
- Connect the included power supply to the back of the router, and plug it into a power outlet.
- Switch the router on.
If you have ordered this router from Internode, you should now test your connection.
Configuring your Internet connection
Step 1
- Make sure that your computer is connected to the NetComm NP803n with an Ethernet cable.
- Open your preferred web browser - for example, Internet Explorer, Google Chrome, or Mozilla Firefox.
- Enter the following number into the address bar and then hit Enter on your keyboard:
- 192.168.20.1 (this number is called an IP Address).
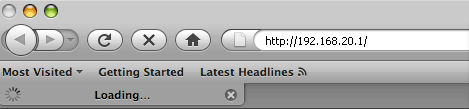 |
| Figure 2: Entering the IP address into the browser |
Step 2
- The NetComm login screen will appear. Enter the router's Username and Password:
| Username: | admin |
|---|---|
| Password: | admin |
| This is the router's default username and password. We recommend that you change the password for security reasons. |
|
- Click Login.
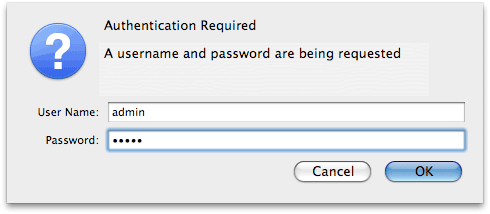 |
| Figure 3: Logging into the NetComm router |
Step 3
- Select Wizard from the left hand menu.
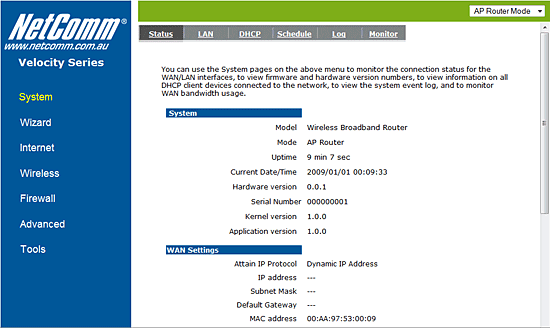 |
| Figure 4: The NetComm NP803n Status Screen |
Step 4
- Click Next to start the setup wizard.
- For FTTP/NBN services, select AP Router Mode, then click Next.
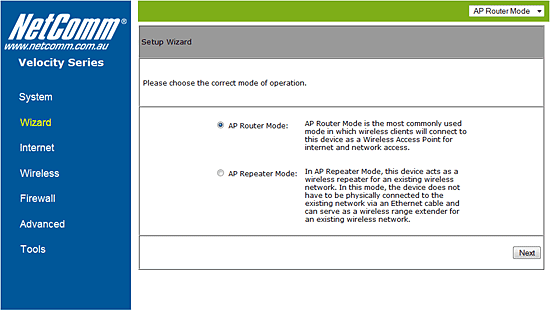 |
| Figure 5: Step 1 of the setup wizard |
Step 5
- The router will attempt to automatically detect services connected to your WAN port.
- Once your FTTP/NBN service has been detected, you will have two options:
- For FTTP/NBN services, choose Others, then click Next.
- If you have an existing modem configured in 'bridge' mode, choose Others, then click Next.
- If your modem is already configured for PPP connections, choose DHCP, then click Next.
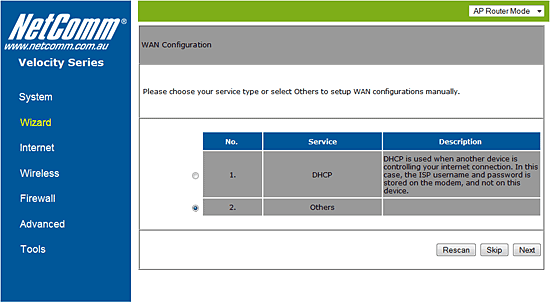 |
| Figure 6: Step 2 of the setup wizard |
Step 6
- Choose PPP over Ethernet as the Login Method.
- Enter your Internode username into the Username field, for example, username@internode.on.net.
NOTE: If your username does not include @internode.on.net you will be unable to connect. - Enter your Internode password into the Password field.
(Lost your password? Click here!) - Leave Service Name blank, then click Next.
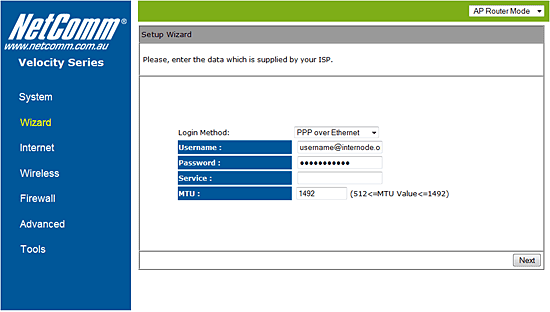 |
| Figure 7: Entering your login information during the setup wizard |
Step 7
- The wireless setup section of the wizard will begin. From the bar on the main part of the screen, choose the second to highest setting as illustrated in the image below.
- Create a name for your wireless network and enter this into the field labelled SSID.
Creating a network name (SSID)
Your network name is used to identify your wireless network. This is particularly useful if there are other wireless networks nearby.
Because your network name will be visible outside of your home or office, the name should be recognisable but should not use any personal or service details.
- Bad Network Names:
BloggsFamily, JoeBloggs, 123JamesStreet, Internode, default, your Internode username, your router's name. - Good Network Names:
MyNetwork, HomeWireless, Homestead, Cookie Monster (be creative!)
- Create a password that will be used to access your wireless network. This needs to be entered into the field marked Key.
Creating a Pre-shared Key (Wireless Password)
A Pre-shared key prevents people you don't know from accessing your wireless network. When you connect your computers to your wireless network, you will be asked for the pre-shared key. If someone tries to connect without the pre-shared key, they will be unable to connect.
Your pre-shared key:
- must have a minimum of 8 alphanumeric characters
- is case sensitive
- should never be the same as your Internode password
We recommend you create a complex password for your pre-shared key.
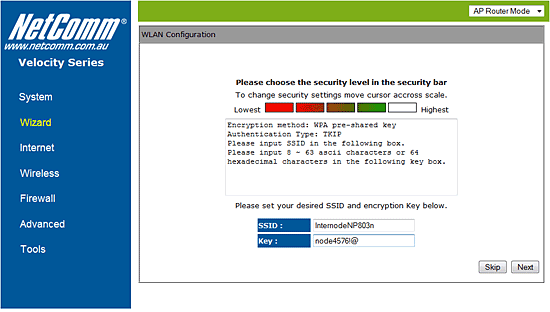 |
| Figure 8: Setting up your wireless network |
Step 8
- Click Next and then Reboot to complete the configuration.
- The router will now restart. Please allow 2-5 minutes before testing your connection.
Congratulations! You have successfully configured your NetComm NP803n to connect to the Internet.
Further Assistance
If you're looking to also set up another service on your NetComm NP803n router, please refer to our other guides:
If you are having trouble setting up your router or would like to clarify some of the steps, please contact our Support Team.