
IPv6 Configuration for NetComm NF2 Routers
This guide is suitable for NetComm NF2 routers.
What we'll cover:
- Logging onto your NetComm NF2
- Configuring IPv6 on your NetComm NF2
- Testing the IPv6 connection
Not what you're looking for? Try the NetComm NF2 Fibre To The Premises guide or the Wireless guide.
Your NetComm NF2 should have IPv6 enabled by default. This guide is only required if IPv6 has been manually disabled during initial setup or via the configuration options.
Configuring your IPv6 connection
Step 1
- Make sure that your computer is connected to your router with an Ethernet cable or wireless connection.
- Open your preferred web browser, for example: Internet Explorer, Google Chrome, or Mozilla Firefox.
- Enter the following number into the address bar and then hit Enter on your keyboard:
- 192.168.20.1 (this number is called an IP Address).
 |
| Figure 1: Entering the IP address to access the router |
Step 2
- The modem Log In page will open. You will be prompted for a username and password.
| Username: | admin |
|---|---|
| Password: | admin |
| This is the router's default username and password. We recommend that you change the password for security reasons. |
|
- Click OK to log in to the router.
Step 3
- If a black background is displayed click the link on the bottom of the page: Switch to advanced view.
- Click Network Setup from the menu to the top of the screen.
- Click Network Setup from the Network Setup drop-down menu.
 |
| Figure 2: The NetComm NF2 Network Settings Menu Option |
Step 4
- The Network Settings page will be displayed.
- In the Network Setup section tick the box titled IPv6 Dualstack and press Save.
- The device should prompt you to configure IPv6, click OK. If no prompt appears, select IPv6 under Advanced Settings in the top menu.
Step 5
- You should now be on the IPv6 Configuration page.
- Select PPPoE from the IPv6 Connection drop down menu.
- Ensure Autoconfiguration is set to Enable.
- Ensure Autoconfiguration Type is set to Stateless.
- Click Save.
- If a pop-up window appears advising that the router needs to restart, simply click Reboot at the bottom of the page and wait until the countdown completes.
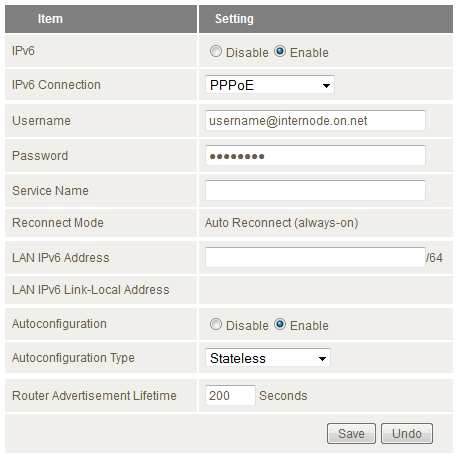 |
| Figure 3: The NetComm NF2 IPv6 Configuration Page |
Testing your IPv6 Connection
Once you have set up your IPv6 connection as above, you can test your connection on the Internode IPv6 website. If you are successful, it will display your IPv6 address in green, as shown below:
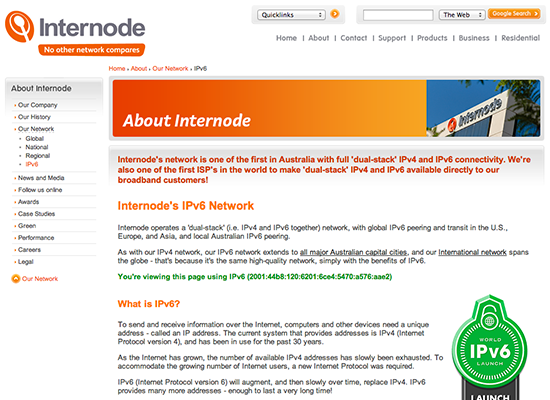 |
| Figure 4: The Internode IPv6 website showing a successful IPv6 connection |
Congratulations! You have successfully configured IPv6 on your NetComm NF2 Router.
Further Assistance
If you're looking to also set up another service on your NetComm NF2 router, please refer to our other guides:
- Fibre To The Premises Configuration for NetComm NF2 Routers
- Wireless Configuration for NetComm NF2 Routers
If you are having trouble setting up your router or would like to clarify some of the steps, please contact our Support Team.