
NodePhone Configuration for Gigaset C610IP
This guide is suitable for the Gigaset C610IP base station, and the Gigaset C610H handset.
What we'll cover:
- Connecting your Gigaset to your router
- Logging into your Gigaset
- Configuring your Gigaset for NodePhone via the web interface
- Configuring your Gigaset for NodePhone via the Gigaset C610H handset
Not what you're looking for? Try the setup guide for the Gigaset C470 and A580.
Gigaset C610IP Cable Setup
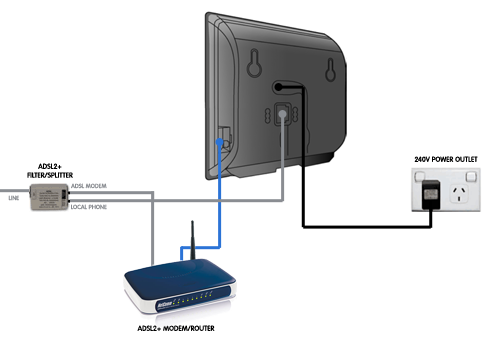 |
| Figure 1: Example cable configuration with fail-over and incoming PSTN set up |
- Connect one end of the supplied Ethernet cable to the network port on the side of the Gigaset base station. Connect the other end to a free port on the back of your router.
- To enable the fail-over & incoming PSTN calls feature with NodePhone, connect a telephone cable from the Local Phone port on the ADSL splitter to the phone port on the back of the base station.
NOTE: If you do not use this feature (for example, because you're on a Naked service and have no analog telephone service) then you do not need to plug anything into the rear port. - Connect the small circular power plug to the rear of the base station.
- Plug the power supply in to a 240V AC outlet. The Gigaset will turn on; there is no physical power switch on the base station.
- The Registration and Paging button on the front of the base station should light up blue. If this light does not light up blue, ensure the Ethernet cable is connected properly between the side port on the base station and your router.
Logging into the Gigaset C610IP web interface
Step 1
- Make sure that your Gigaset C610IP is connected to your router with an Ethernet cable, and that your computer has access to the Internet.
- Open your preferred web browser, for example: Internet Explorer, Google Chrome, or Mozilla Firefox.
- Enter the following address into the address bar and then hit Enter on your keyboard:
- http://www.gigaset-config.com
 |
| Figure 2: Entering the address to access the router |
Step 2
- The Gigaset C610IP Log In page will open. You will be prompted for a PIN.
- Enter 0000 in the PIN field, then click OK to continue.
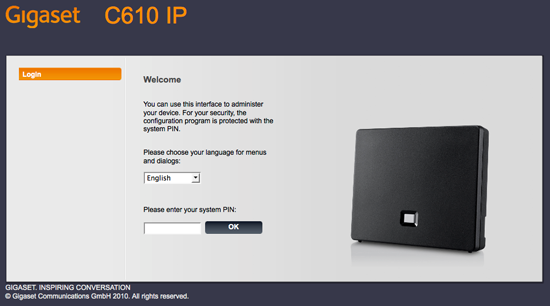 |
| Figure 3: The Gigaset C610IP Login Screen |
Configuring via the web interface: Determining your firmware version
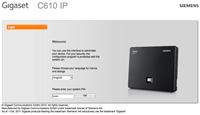
The Gigaset may display different options depending on the firmware version it is running. You will be able to tell which version of the firmware you have by the background colour.
- The old firmware will display a white background, and a Siemens logo in the top-right corner.
- The new firmware will display blue-grey background, and there will not be a Siemens logo present.
Click the appropriate screenshot below to follow the guide for your firmware version:
 |
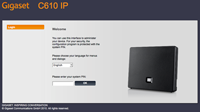 |
| Figure 4: Old Gigaset firmware. | Figure 5: New Gigaset firmware. |
Configuring a Gigaset C610IP running new firmware
Step 1
- Log in to the Gigaset C610IP as per the instructions above.
- The Gigaset C610IP page will be displayed. Click the Quick Start Wizard link in the menu.
 |
| Figure 6: The Gigaset C610IP menu item for the Quick Start wizard |
If the Quick Start Wizard is NOT visible, follow these steps to access the Wizard:
- Click Settings at the top of the page.
- Select Telephony from the menu on the left. Further options will drop down underneath.
- Select Connections from the new options.
- Select Edit, to the right of IP1.
- Click Start Configuration Assistant in the middle of the page.
This will allow you to access the Quick Start Wizard.
Step 2
- You will be asked for an auto-configuration code. Ensure that No is selected.
- Click Next to continue the wizard.
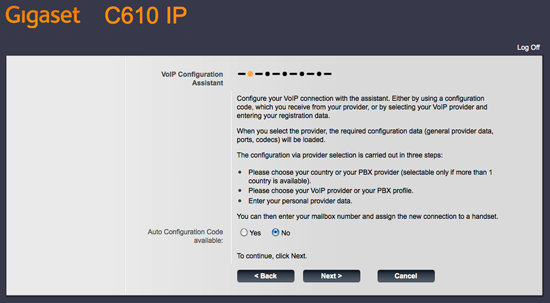 |
| Figure 7: Selecting "no" for the auto-configuration code. |
Step 3
- You will be asked to choose the country of your phone provider. Select Australia from the drop-down menu.
- Click Next to continue.
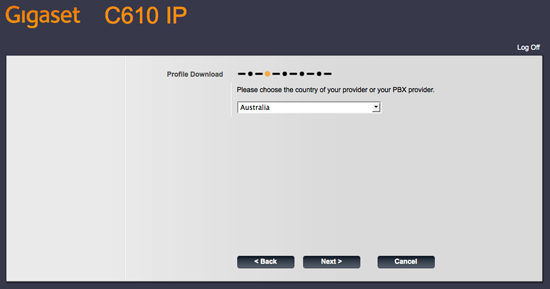 |
| Figure 8: Selecting your country. |
Step 4
- You will be asked to choose your phone provider. Select NodePhone from the drop-down menu.
- Click Next to continue.
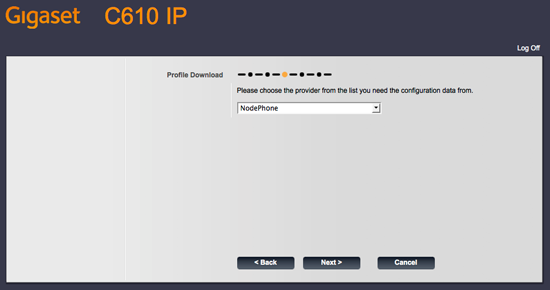 |
| Figure 9: Selecting NodePhone from the provider list. |
Step 5
- The wizard will ask for your NodePhone login information.
- Enter your details as follows:
| Authentication name: | Your NodePhone number Make sure that you include the area code and that there are no spaces in the number, for example, 0812345678 |
|---|---|
| Authentication password: | Your NodePhone password |
| Username: | Your NodePhone number Make sure that you include the area code and that there are no spaces in the number, for example, 0812345678 |
| Display Name: | Your NodePhone Number Make sure that you include the area code and that there are no spaces in the number, for example, 0812345678 |
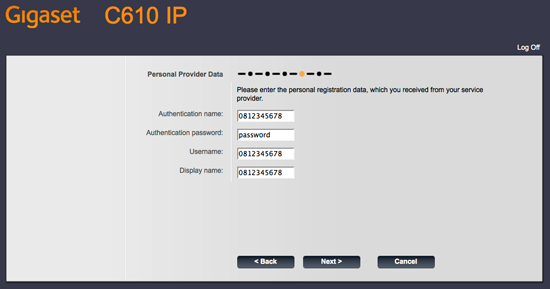 |
| Figure 10: Entering your NodePhone login information. |
- Click Next when your NodePhone information has been entered.
- The Gigaset will attempt to register your NodePhone account. If successful, it will report: Registering at provider successful.
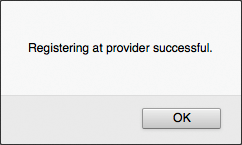 |
| Figure 11: Successful NodePhone Registration. |
Step 6
- Finally, the wizard may ask if you wish to make outgoing calls via VoIP. Select Yes.
- Click Next to complete the wizard.
Congratulations! You have successfully configured your NodePhone service.
Configuring a Gigaset C610IP running old firmware
Step 1
- Log in to the Gigaset C610IP as per the instructions above.
- The Gigaset C610IP page will be displayed. Click the Settings link in the menu at the top of the screen.
- Click Telephony from the menu on the left. Further options will drop down underneath.
- Click Connections from the new options that appear.
- Select Edit, to the right of IP1 (Other Provider).
- Select Select VoIP Provider, mid-way down the screen.
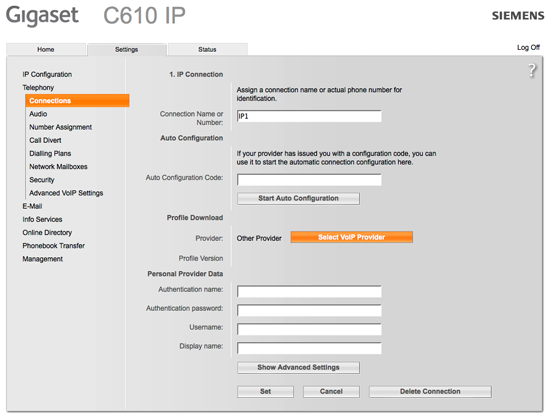 |
| Figure 12: Selecting Select VoIP Provider from the Telephony Connections screen. |
Step 2
- The VoIP Provider wizard will start. Click Next to begin.
Step 3
- You will be asked to choose the country of your phone provider. Select Australia from the drop-down menu.
- Click Next to continue.
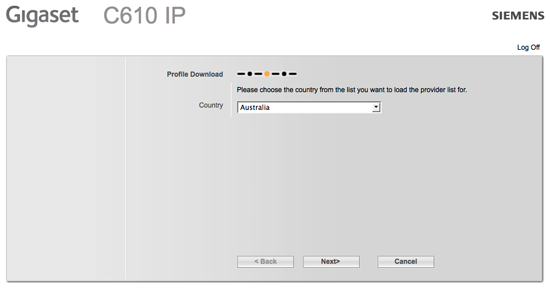 |
| Figure 13: Selecting your country. |
Step 4
- You will be asked to choose your phone provider. Select NodePhone from the drop-down menu.
- Click Next to continue.
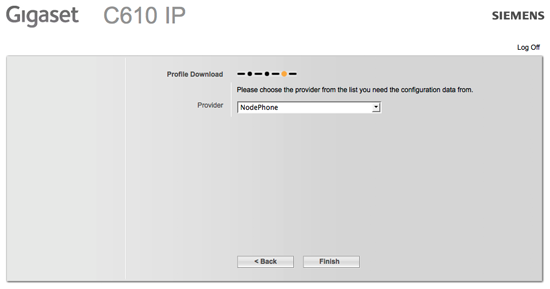 |
| Figure 14: Selecting NodePhone from the provider list. |
- The wizard will retrieve the NodePhone data.
- If this is successful, you will see: Provider data has been downloaded.
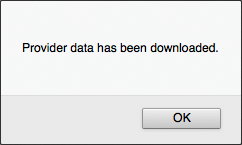 |
| Figure 15: Successful download of provider data. |
Step 5
- You will be returned to the Telephony Configuration page.
- In the Personal Provider Data section, enter your details as follows:
| Authentication name: | Your NodePhone number Ensure that you include the area code and that there are no spaces in the number, for example, 0812345678 |
|---|---|
| Authentication password: | Your NodePhone password |
| Username: | Your NodePhone number Ensure that you include the area code and that there are no spaces in the number, for example, 0812345678 |
| Display Name: | Your NodePhone Number Ensure that you include the area code and that there are no spaces in the number, for example, 0812345678 |
- Click Set when you have entered the information above.
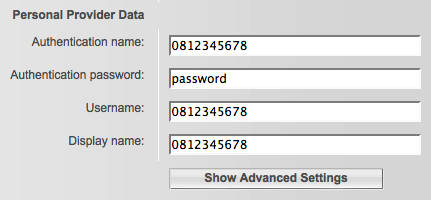 |
| Figure 16: Entering your NodePhone login information. |
Congratulations! You have successfully configured your NodePhone service.
Configuring a Gigaset C610IP using the Gigaset Handset
Step 1
- Once your Gigaset is connected properly, the Envelope button on the handset will flash red.
- Press the Envelope button to begin the wizard.
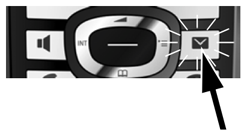 |
| Figure 17: The Envelope button on the Gigaset handset. |
Step 2
- The Start IP Installation Wizard will begin. Click Yes to begin.
- An explanation screen may appear. Click OK.
 |
| Figure 18: Start IP installation. |
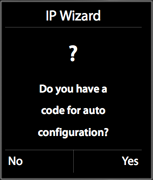
Step 3
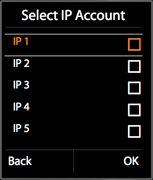
- The Select IP Account screen will appear. Select IP1.
- You will be asked if you have a code for auto configuration. Select No.
  |
|
| Figure 19: Select IP Account, and the auto configuration prompt. | |
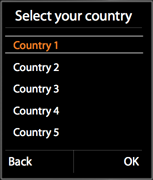
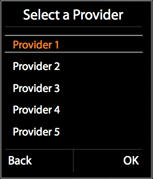
Step 4
- You will be asked to select your country. Choose Australia.
- You will be asked to select a provider. Choose NodePhone from the list. You may need to scroll down to find it.
  |
|
| Figure 20: The screens to select your country and VoIP provider. | |
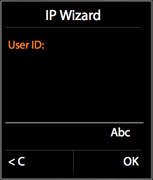
Step 5
- The Gigaset will then ask for your NodePhone login information.
- Enter your information as follows:
Press the hash (#) key to change the input type to numbers
(you should see the Abc on the screen change to 123)
Press the hash (#) key again to change the input back to letters.
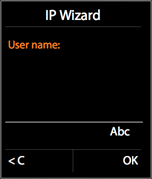
| User ID: | Your NodePhone number Ensure that you include the area code and that there are no spaces in the number, for example, 0812345678 |
|---|---|
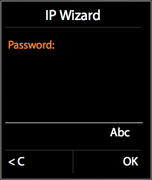
| Password: | Your NodePhone password |
| User name: | Your NodePhone number Ensure that you include the area code and that there are no spaces in the number, for example, 0812345678 |
   |
|
| Figure 21: Entering a User ID, password, and username. | |
Step 6
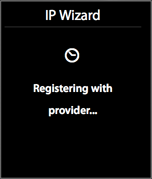
- The phone will then attempt to register your NodePhone account.
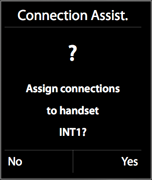
- If successful, you will be asked to assign connections to the handset. Press Yes to receive NodePhone calls on the handset.
  |
|
| Figure 22: Registering, and assigning connections to your handset. | |
Step 7
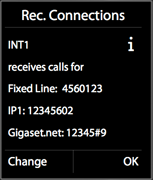
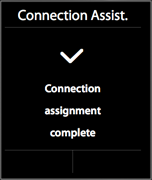
- The Gigaset should then ask you to review the receiving settings.
- If you want to configure the phone to make calls over NodePhone, press Change. Using the left direction key, set the Connection for outgoing calls to IP1 and press Save, then OK.
- If you do not want to configure the phone to make calls over NodePhone, simply click OK to continue.
- If there are any remaining Wizard questions, click OK until you see the screen reporting successful completion.
  |
|
| Figure 23: The summary screen, and completion screen. | |
Congratulations! You have successfully configured your NodePhone service.
Further Assistance
If you're looking for the set-up guide for the Gigaset C470 and A580, please refer to our other guide:
If you are having trouble setting up your handset, or would like to clarify some of the steps, please contact our Support Team.