
ADSL Configuration for Billion 7300(G)RA, 7401VGP-R3, and 7404-X Routers
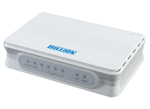
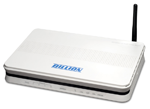
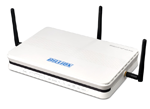
This guide is suitable for the following Billion routers:
 |
 |
 |
|
|
|
What we'll cover:
- Connecting cables
- Logging into your router
- Setting up your ADSL2+ connection
Not what you're looking for? Try the Billion NodePhone VoIP guide, or the Wireless guide.
If you're not using your router's wireless capability, set your wireless to Disabled. See the Billion Wireless guide to change your wireless settings.
Billion Cable Setup
Connection of your modem will vary depending on whether you have a Standard ADSL or a Naked ADSL service. Additional connections such as Wireless, VoIP, and USB fall-back vary from model to model and may not be appropriate for your modem.
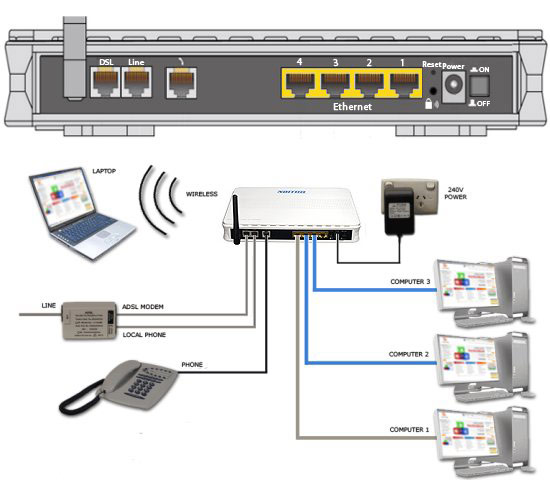 |
| Figure 1: Example cabling connections |
Cabling for Standard and Naked ADSL2+ connections
If you have a Naked ADSL service, you do not require an ADSL filter/splitter. Simply connect the router's DSL port directly to the telephone socket without incorporating the ADSL splitter.
- Connect a phone cable from the Line or Wall Socket port on the ADSL splitter to the telephone port on your wall.
- Connect a phone cable from the ADSL Modem port on the splitter to the DSL port on the back of the Billion router.
NOTE: Ensure that your cable is less than 3 metres long: longer cables can affect the performance of your service. - If you are not configuring NodePhone, connect the telephone to the Local Phone port on the ADSL splitter.
NOTE: All devices connected to the ADSL line on any socket in the premises also need to be connected to an ADSL filter. - Connect one end of the supplied Ethernet cable to the network port on your computer. Connect the other end to one of the Ethernet or LAN ports on the back of the router.
- Connect your wireless aerial if appropriate.
- Connect the power supply to the back of the router, and plug it into your 240v power outlet.
- Switch on the router.
Cabling for NodePhone VoIP with fall-back
This will set up NodePhone with a "fall-back" to your regular (PSTN) telephone service. This will allow you to switch between your NodePhone service and the regular PSTN service.
When dialling out through NodePhone, you will hear a distinctive dial-tone, which sounds like a long hum. On most handsets, pressing the # key will switch between your NodePhone service and your PSTN service.
- Connect a phone cable between the Local Phone port on the ADSL splitter and the Line port on the Billion modem.
- Connect your telephone handset to the port on the router marked with a picture of a handset. Some modems may have a second socket for another handset to be connected.
Configuring your Internet connection
Step 1
- Open your preferred web browser, for example: Internet Explorer, Google Chrome, or Mozilla Firefox.
- Enter the following number into the address bar and then hit Enter on your keyboard:
- 192.168.1.254 (this number is called an IP Address).
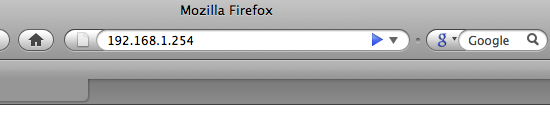 |
| Figure 2: Entering the IP Address to access the modem |
Step 2
- The Billion configuration page will open. You will be prompted for a username and password.
| Username: | admin |
|---|---|
| Password: | admin |
| This is the router's default username and password. We recommend that you change the password for security reasons. |
|
- Click the OK or Login button at the bottom of the page.
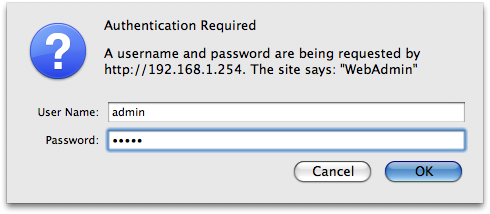 |
| Figure 3: Entering login information to access the router |
Step 3
- The Billion status page will be displayed. This will show details including the model of your modem, and the current firmware version (the software that runs the modem).
- Click the WAN link in the menu to the left of the screen.
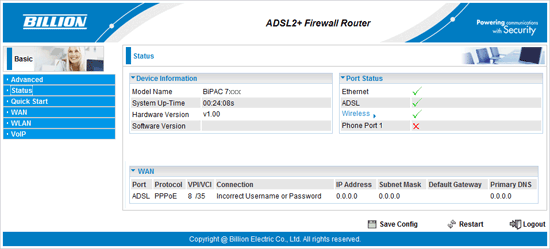 |
| Figure 4: The Billion 'Status' page |
Step 4
- Make sure that the WAN settings are as follows:
- Select PPPoE from the Protocol drop-down menu.
- Make sure the VPI setting is 8.
- Make sure the VCI setting is 35.
- Make sure the IP Address remains set to 0.0.0.0. Your modem will be assigned an IP address automatically when it logs in (even if you have a static IP address).
- Set Obtain DNS Automatically to Enable.
NOTE: Alternatively, you may enter the Internode DNS settings: 192.231.203.132 and 192.231.203.3 - Enter your Internode username into the Username field, for example, username@internode.on.net
NOTE: If your username does not include @internode.on.net you will be unable to connect. - Enter your Internode Password.
- Click Apply when you have made your changes.
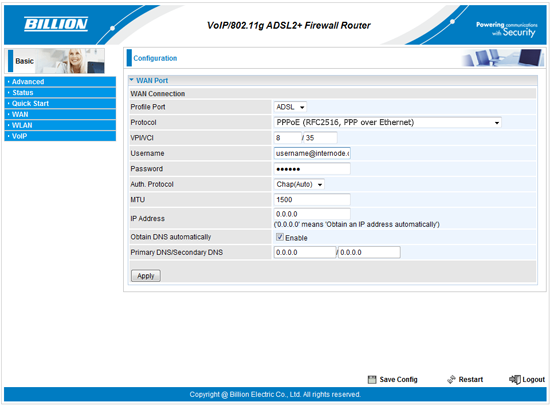 |
| Figure 5: The 'WAN Port Configuration' screen with correct settings |
Step 5
- Once settings have been applied, click Save Config at the bottom right of the page.
- The modem will ask you to confirm that you wish to save your configuration. Click Apply to save the settings.
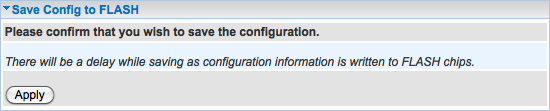 |
| Figure 6: The 'Save Config to FLASH' Screen |
Step 6
- Saving the configuration can take up to 20 seconds. Once the configuration has been saved, another box may pop-up confirming that Save Config to FLASH Successful.
- Click OK. The modem will return to either the 'Save Settings' page, or the 'Status' page.
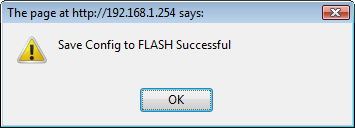 |
| Figure 7: Confirmation of saved settings |
Step 7
- Restart your router by either switching the router power off for 1 minute or selecting 'restart with current settings' on the bottom right of the page. (This will preserve your settings.)
Your Billion router should have now connected to the Internet. If you get a message advising that the connection has failed, repeat the above steps, ensuring the settings are all correct.
Further Assistance
If you're looking to also set up your NodePhone VoIP or Wireless service for your Billion router, please refer to our other guides:
If you are having trouble setting up the modem or would like to clarify some of the steps, please contact the Helpdesk.