
ADSL configuration for FRITZ!Box Routers
This guide is suitable for FRITZ!Box 7490, 7390, 7360, and 7272 routers using the latest FRITZ!OS firmware.
What we'll cover:
- Connecting cables
- How to log into your FRITZ!Box
- Setting the language, region, and password for your FRITZ!Box
- Using the setup wizard to configure your ADSL connection
- Using the setup wizard to configure NodePhone VoIP
- Using the setup wizard to configure your Wireless network
If you purchased your FRITZ!Box from Internode as part of a new broadband service, we've already configured your username, password, and other settings. In this case, simply follow the cabling setup section below, then test your connection.
Not what you're looking for? Try the FRITZ!Box guides for manual ADSL setup, NodePhone VoIP, or Wireless configuration.
FRITZ!Box Cable Setup
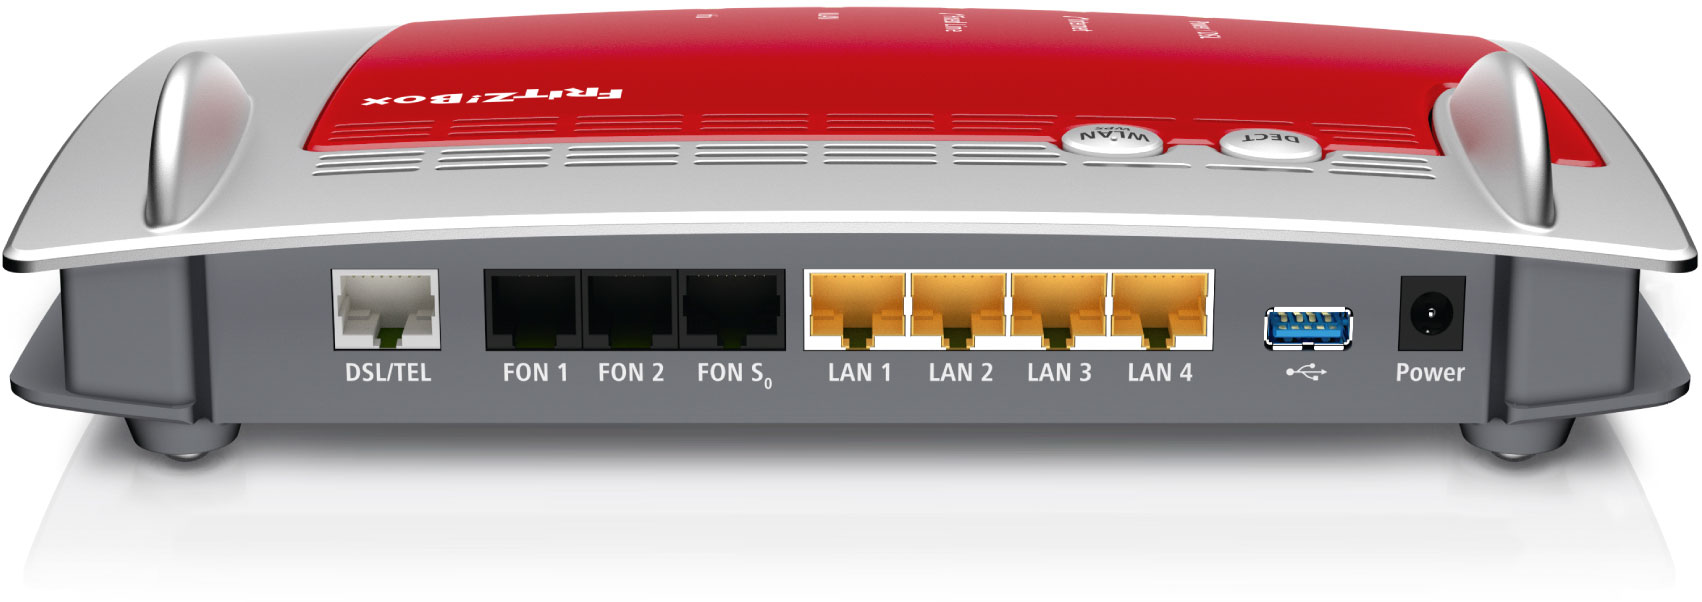 |
| Figure 1: The ports on a FRITZ!Box 7490 router. These ports are the same on the 7390 and 7272. |
The FRITZ!Box uses a RJ45-style connection for the ADSL port on the back of the device. Each unit includes an all-in-one version of the 'Y' cable without separate adapters. If you have a FRITZ!Box 7360 it will be a straight cable, as the 7360 does not support landline phone calls - this cable should connect only to the DSL socket on the filter.
NOTE: Initial shipments of FRITZ!Box units had RJ45 plugs on the included 'Y' splitter. RJ45 to RJ11 adapters are included and must be used to connect the 'Y' cable to your ADSL splitter.
 |
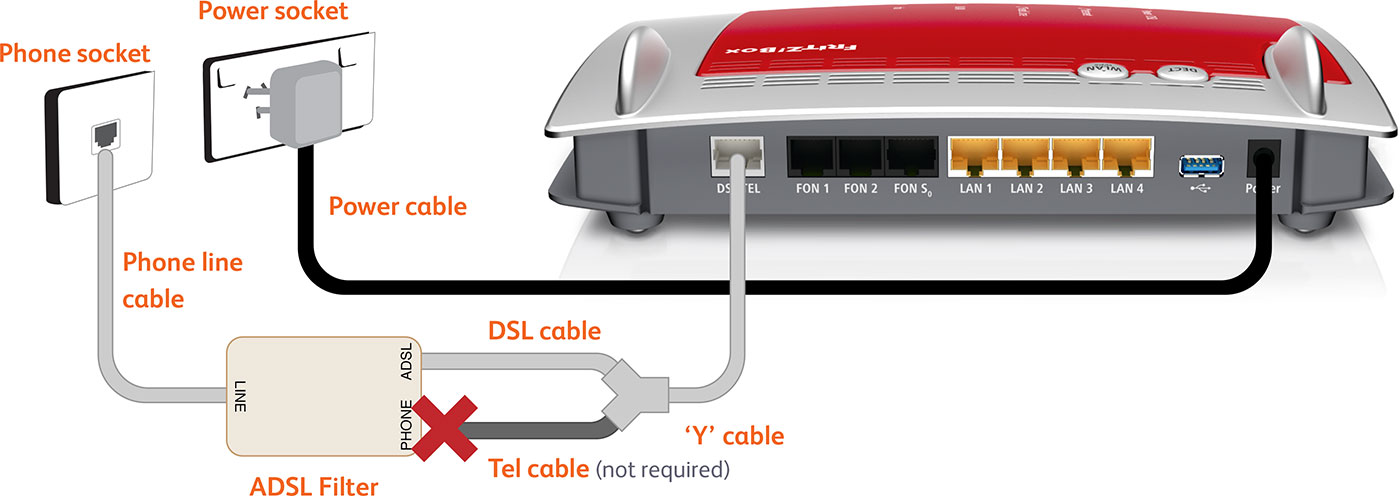
| Figure 2: Typical cabling for a FRITZ!Box 'Y' cable |
Cabling for Standard ADSL Connections
Please note that the following does not apply for the 7360.
- Connect the larger (RJ45) end of the 'Y' cable to the DSL/TEL port on the router.
- Connect the small, black end of the 'Y' cable (labelled Tel) to the Local Phone port on the ADSL splitter.
- Connect the remaining small end of the 'Y' cable (labelled DSL) to the ADSL Modem port on the ADSL splitter.
- Connect one end of the supplied Ethernet cable to the network port on your computer. Connect the other end to one of the LAN ports on the back of the router.
- Connect the power supply to the back of the router, and plug it into your 240v power outlet.
- Switch on the router.
Cabling for Naked ADSL and FRITZ!Box 7360
- Connect the larger (RJ45) end of the 'Y' cable to the DSL/TEL port on the router.
- Connect the small, grey end of the 'Y' cable (labelled DSL) to the telephone port on the wall.
- Connect one end of the supplied Ethernet cable to the network port on your computer. Connect the other end to one of the LAN ports on the back of the router.
- Connect the power supply to the back of the router, and plug it into your 240v power outlet.
- Switch on the router.
 |
| Figure 3: Cabling for a Naked ADSL connection |
Setting the language, region, and password for your FRITZ!Box
The following steps only apply if your FRITZ!Box is not already configured, or if it has been reset to factory default settings.
If you purchased your FRITZ!Box from Internode, your router has been pre-configured. Simply follow the cabling steps above to set up your ADSL broadband service.
Step 1
- Make sure that your computer is connected to the FRITZ!Box - either with an Ethernet cable, or over a wireless network.
- Open your preferred web browser, for example: Internet Explorer, Google Chrome, or Mozilla Firefox.
- Enter the following number into the address bar and then hit Enter on your keyboard:
- 192.168.178.1 (this number is called an IP Address).
 |
| Figure 4: Entering the IP address to access the router |
Step 2
- The Language Selection screen will appear.
- Select English from the list, then click Next.
 |
| Figure 5: Setting your FRITZ!Box language |
Step 3
- The Regional Settings screen will appear.
- Select Australia from the drop-down menu.
- Select your state from the Time Zone drop-down, then click Next.
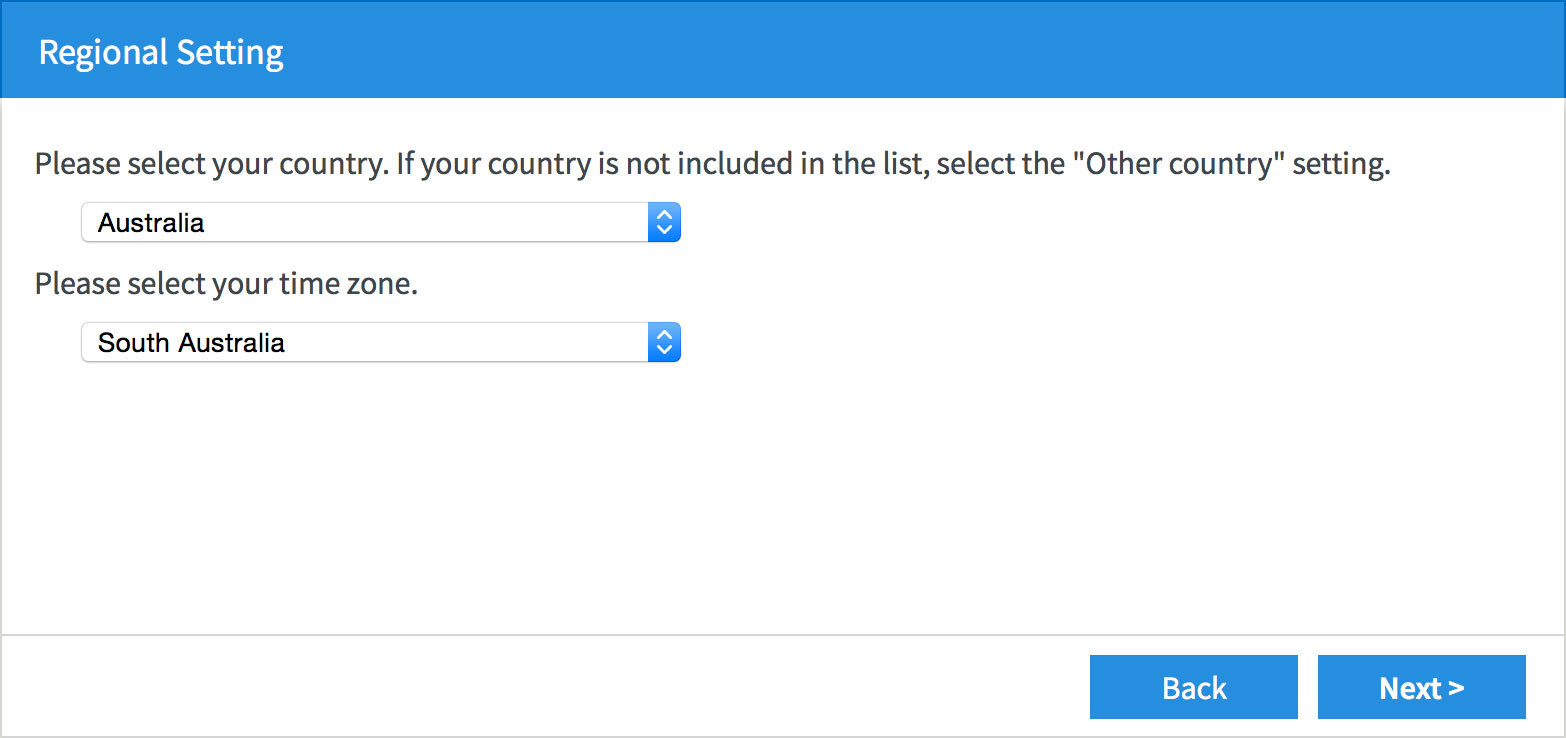 |
| Figure 6: Setting your FRITZ!Box regional settings |
- The modem will save your settings and reboot. This may take around two minutes.
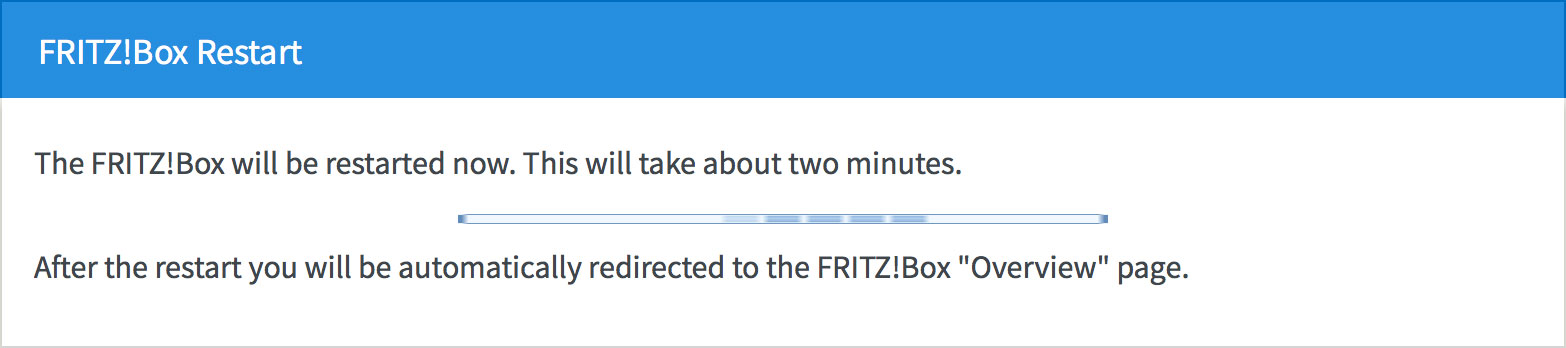 |
| Figure 7: The FRITZ!Box rebooting screen |
Step 4
- The wizard will ask you to create an Administrator Password. You will need this password in future when you try to log in to your FRITZ!Box router.
- Enter your chosen password into the FRITZ!Box password box.
- Click OK to save your password.
Please make a note of your new Administrator Password, as Internode will not be able to provide it to you if it is lost or forgotten.
If you forget the password, you will need to factory reset your FRITZ!Box before you can access the user interface.
You can reset the FRITZ!Box to factory settings by clicking Forgot your password? and then Restore Factory Settings at the login screen (see Step 5 below). Please note that this will overwrite all of your settings.
Once you have reset your FRITZ!Box to factory settings, you will have to restart this wizard from the beginning.
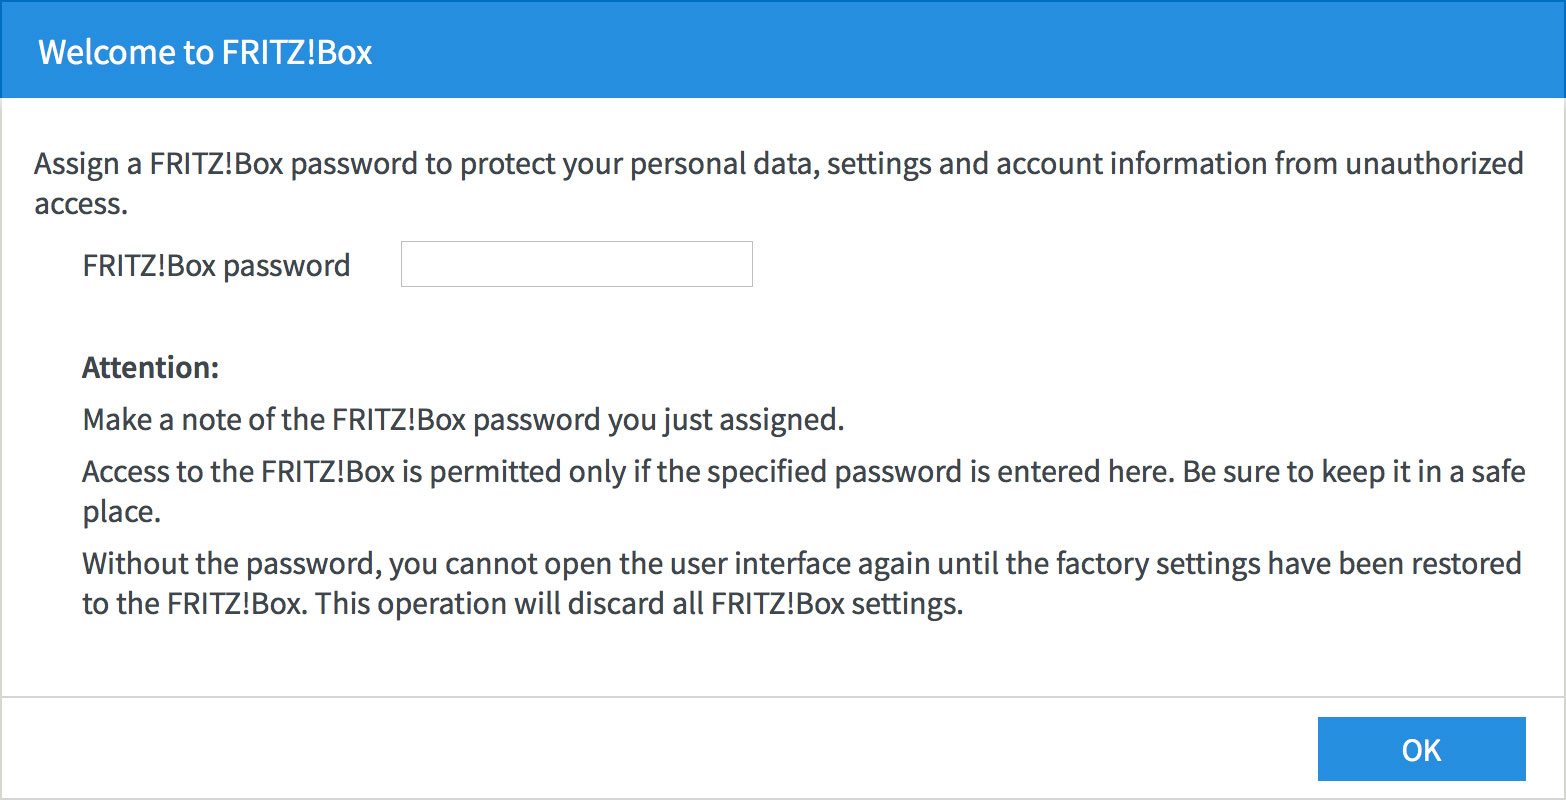 |
| Figure 8: Creating an Administrator password for your FRITZ!Box |
Using the setup wizard to configure your Internet connection
Step 1
- The router will display a welcome screen. Click Next.
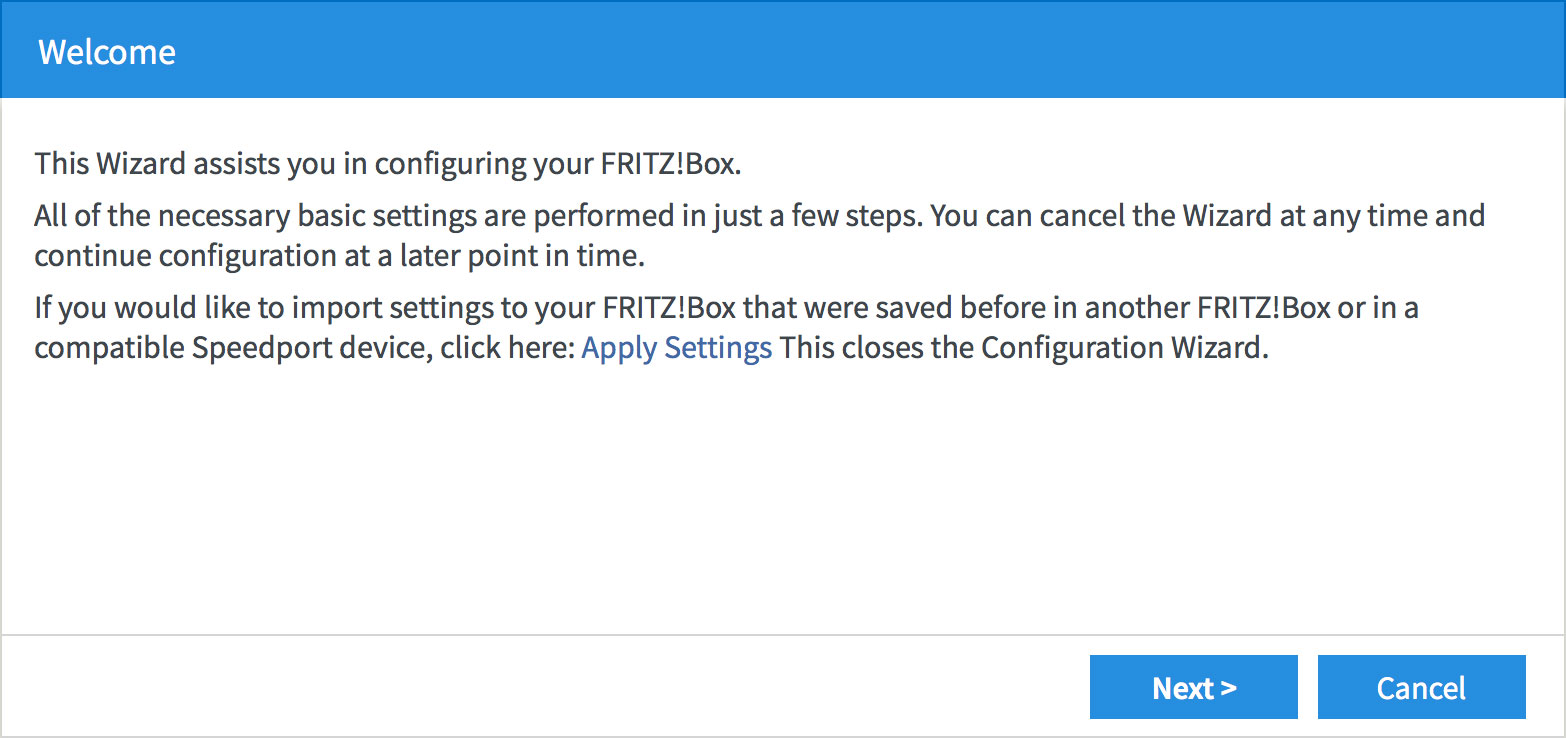 |
| Figure 10: The setup wizard welcome screen |
Step 2
- The wizard will ask you to select your Internet Service Provider.
- Select Internode from the drop down menu.
- Click Next to continue the wizard.
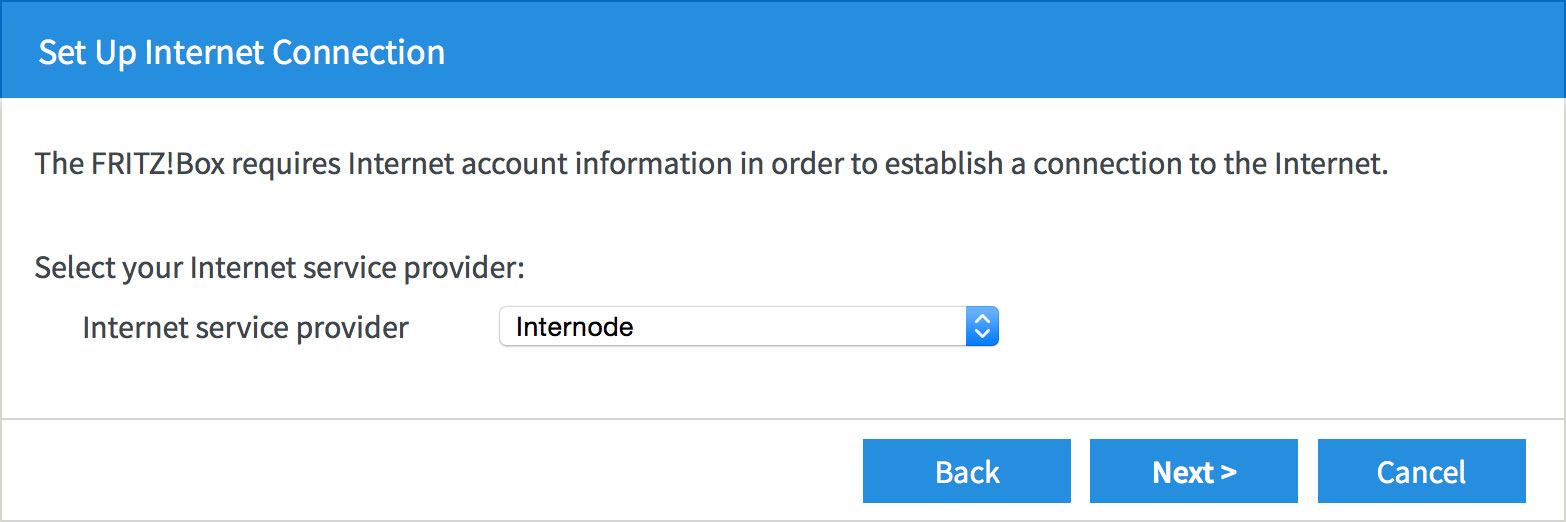 |
| Figure 11: Selecting your ISP |
Step 3
- The wizard will ask for your Internode connection details.
- Enter your Internode username into the User name field, that is, username@internode.on.net.
NOTE: If your username does not include @internode.on.net you will be unable to connect. - Enter your Internode password into the Password field. If you've forgotten your password, you can retrieve it with our Password Retrieval tool.
- Click Next to continue.
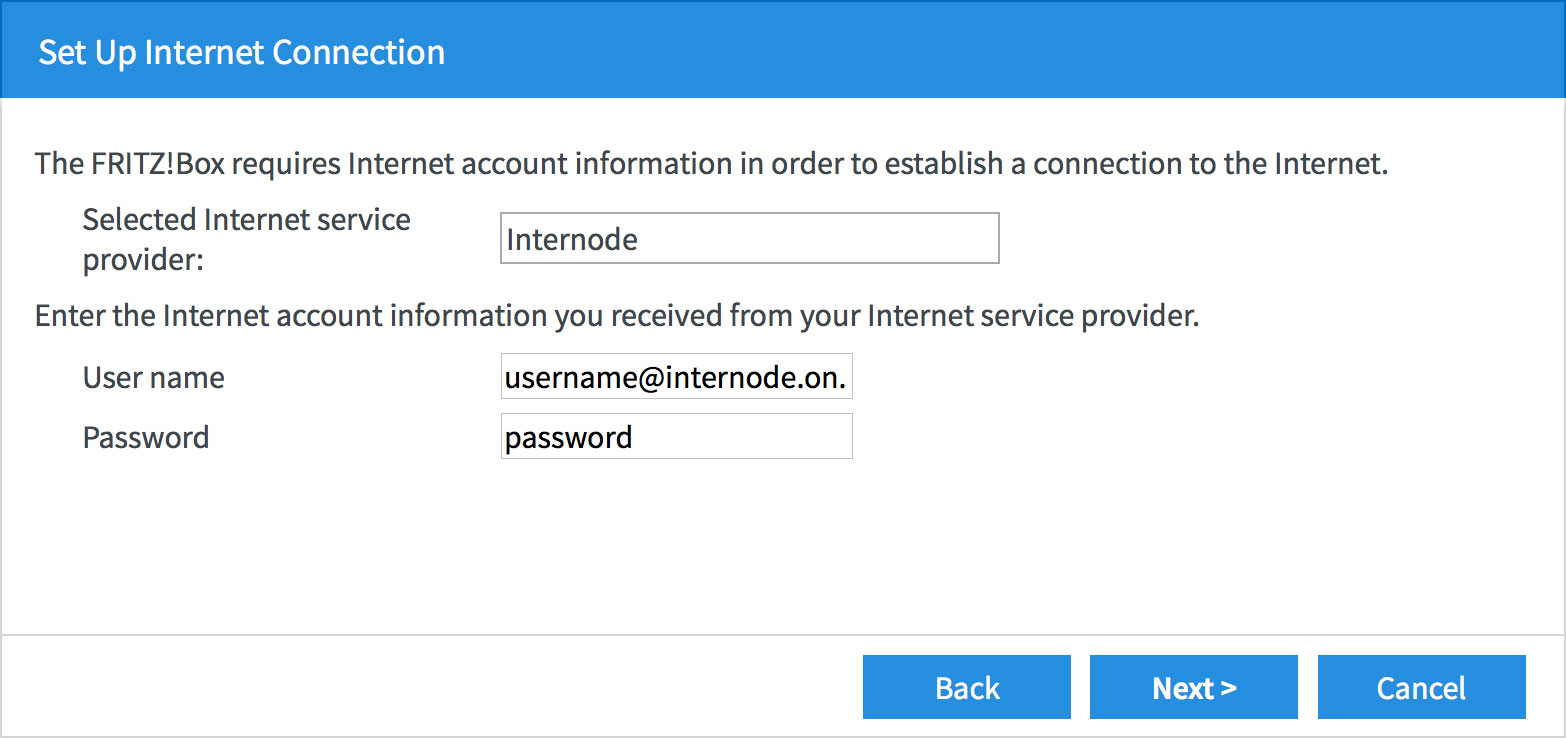 |
| Figure 12: Entering your Internode username and password |
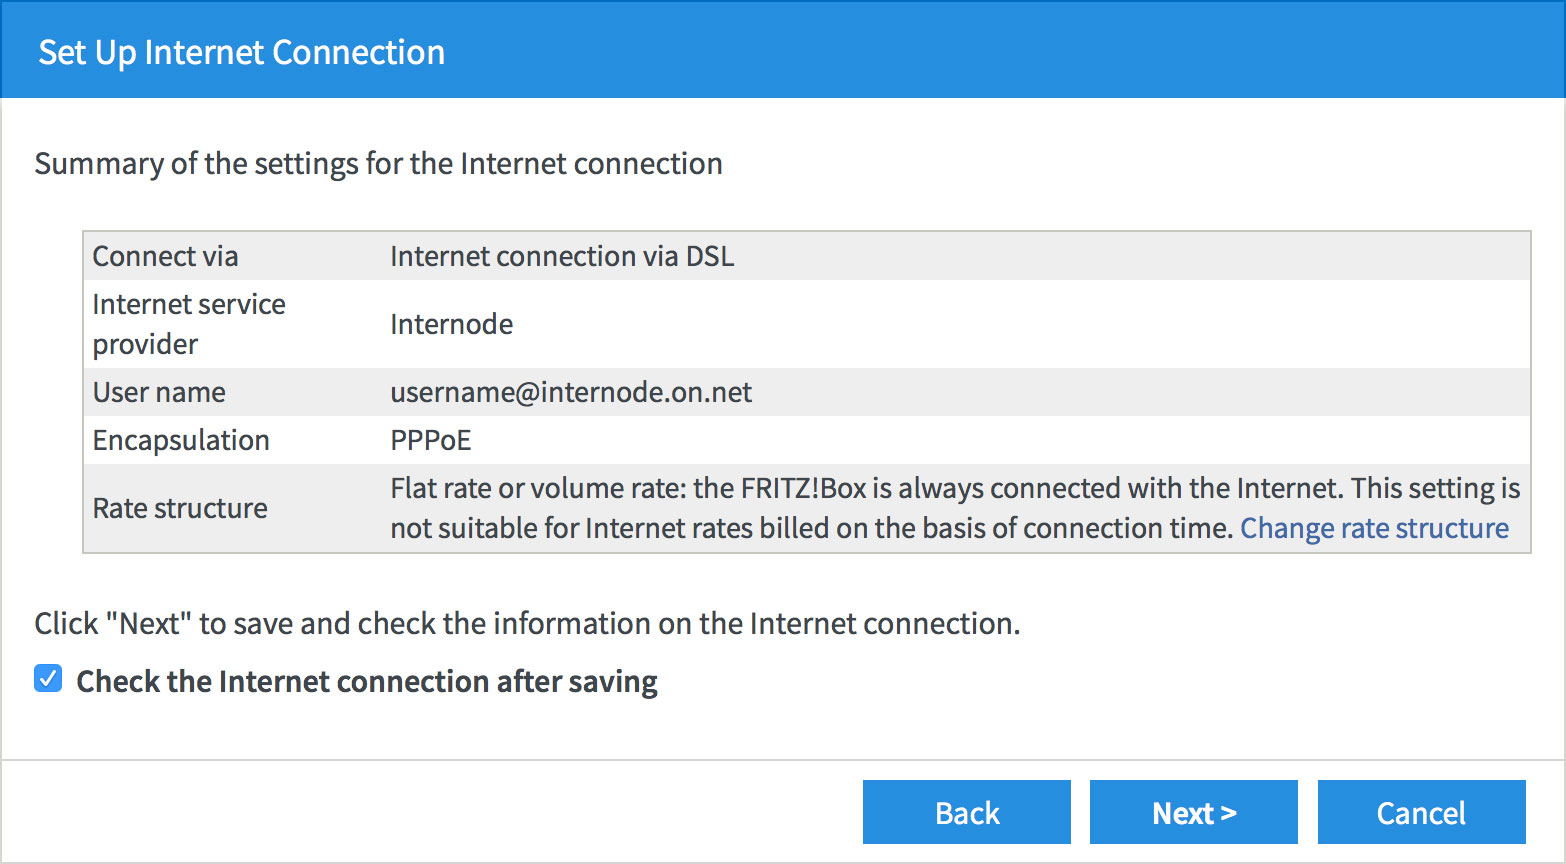
Step 4
- The wizard will ask you to confirm your settings.
- If all the settings are correct, press Next to continue.
- If the settings are not correct, press Back to make any necessary corrections.
 |
| Figure 13: Checking your connection settings |
Step 5
- The FRITZ!Box will save your settings. This may take a few minutes.
 |
| Figure 14: Saving your account settings |
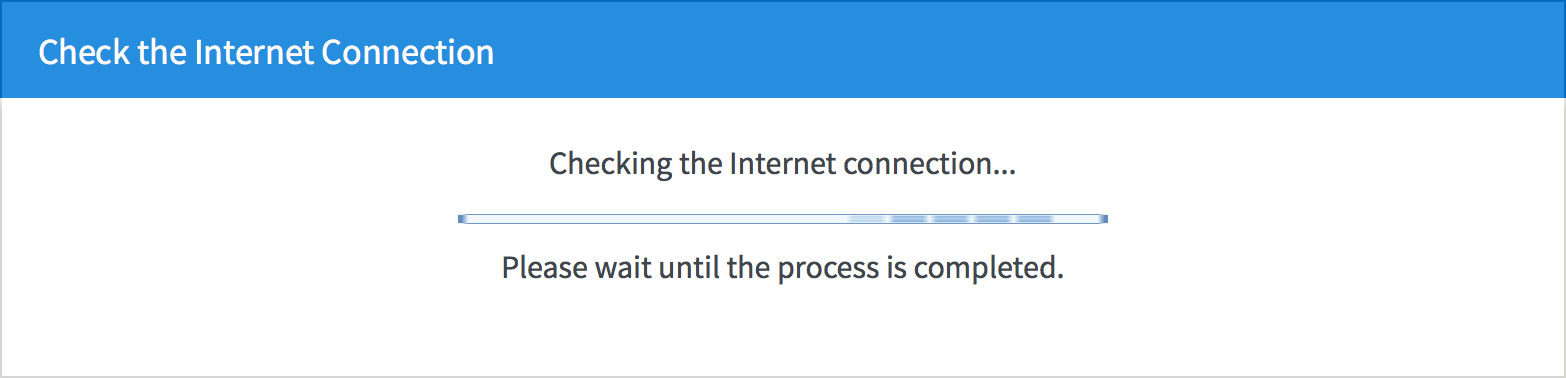
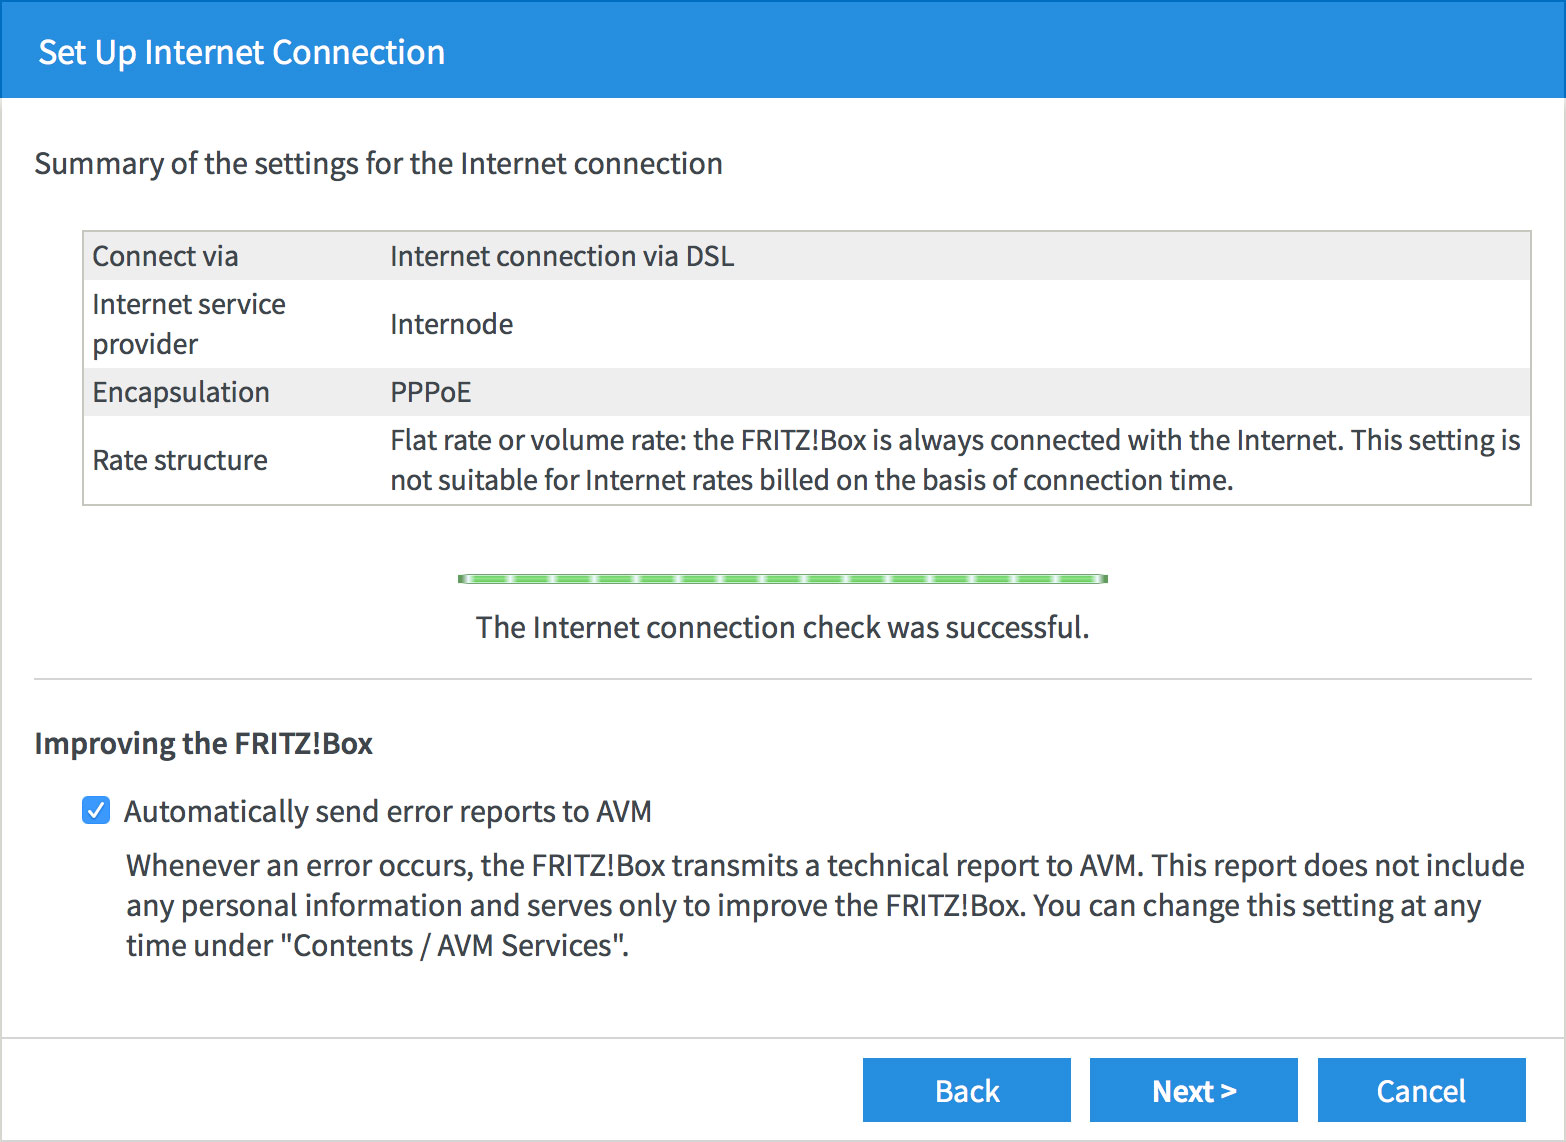
Step 6
- The FRITZ!Box will test your internet connection. If successful, click Next.
 |
| Figure 15: A successful Internet test |
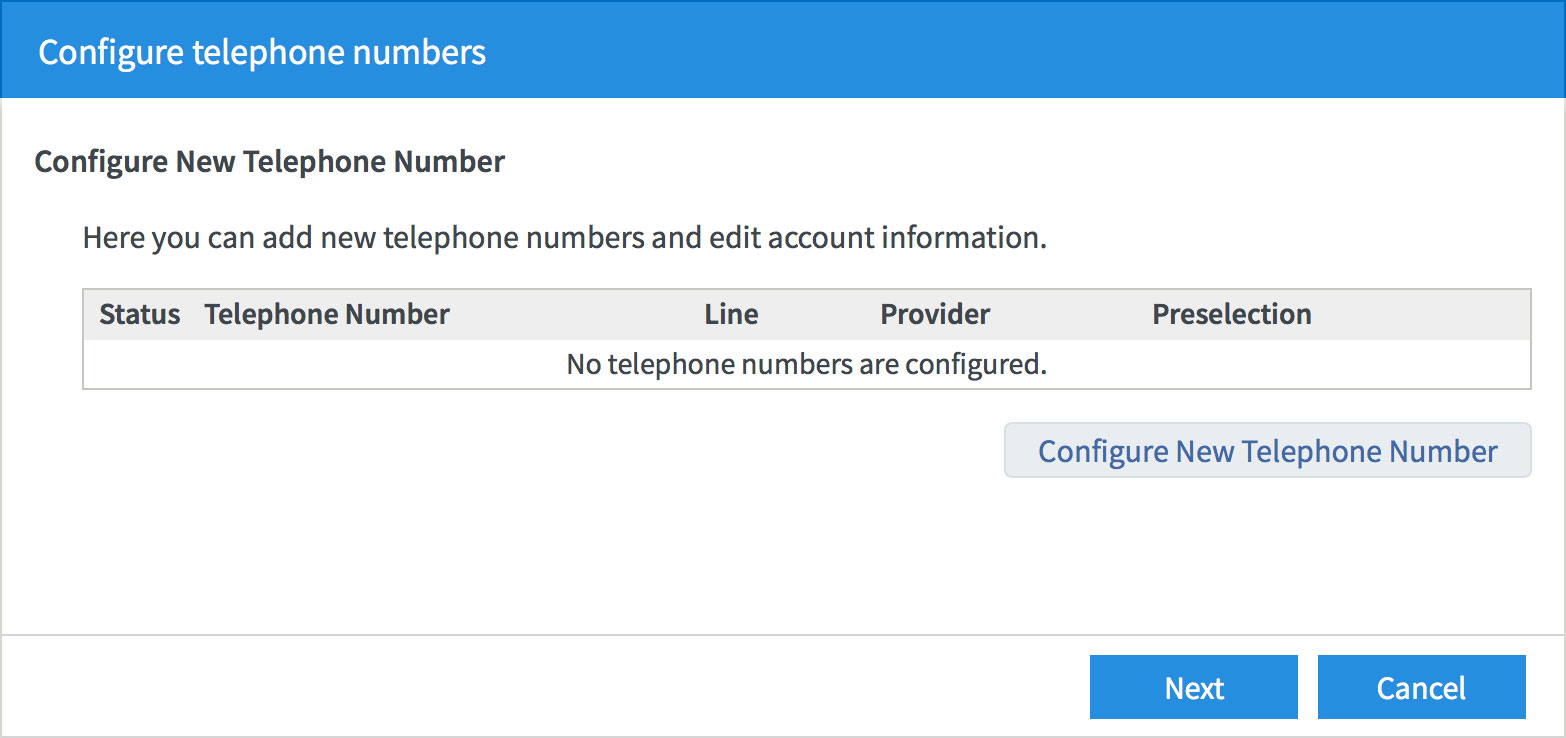
Step 7
- The Internet setup has been completed. If you do not need to set up NodePhone VoIP or WiFi, select Cancel.
- If you would like to set up NodePhone VoIP, click Configure new telephone number to continue with NodePhone VoIP setup.
- If you would like to set up your WiFi, click Continue to skip to Wireless network setup.
 |
| Figure 16: The end of the Internet Connection wizard |
NodePhone VoIP Setup Wizard
Step 1
- Select Configure new telephone number if you have not already done so in Step 7 of Internet setup.
- The FRITZ!Box will now ask how it is connected to your telephone line:
- If you have a standard ADSL service and regular phone line:
select Fixed-network line and DSL line. This will allow your telephone to make calls via both NodePhone VoIP and a fixed-line service (PSTN). - If you have a Naked ADSL, FTTH, or NBN service:
select IP-based line. Select this option also if you don't intend to use a standard fixed-line (PSTN) service.
- If you have a standard ADSL service and regular phone line:
- Once you have made your selection, click Next to continue.
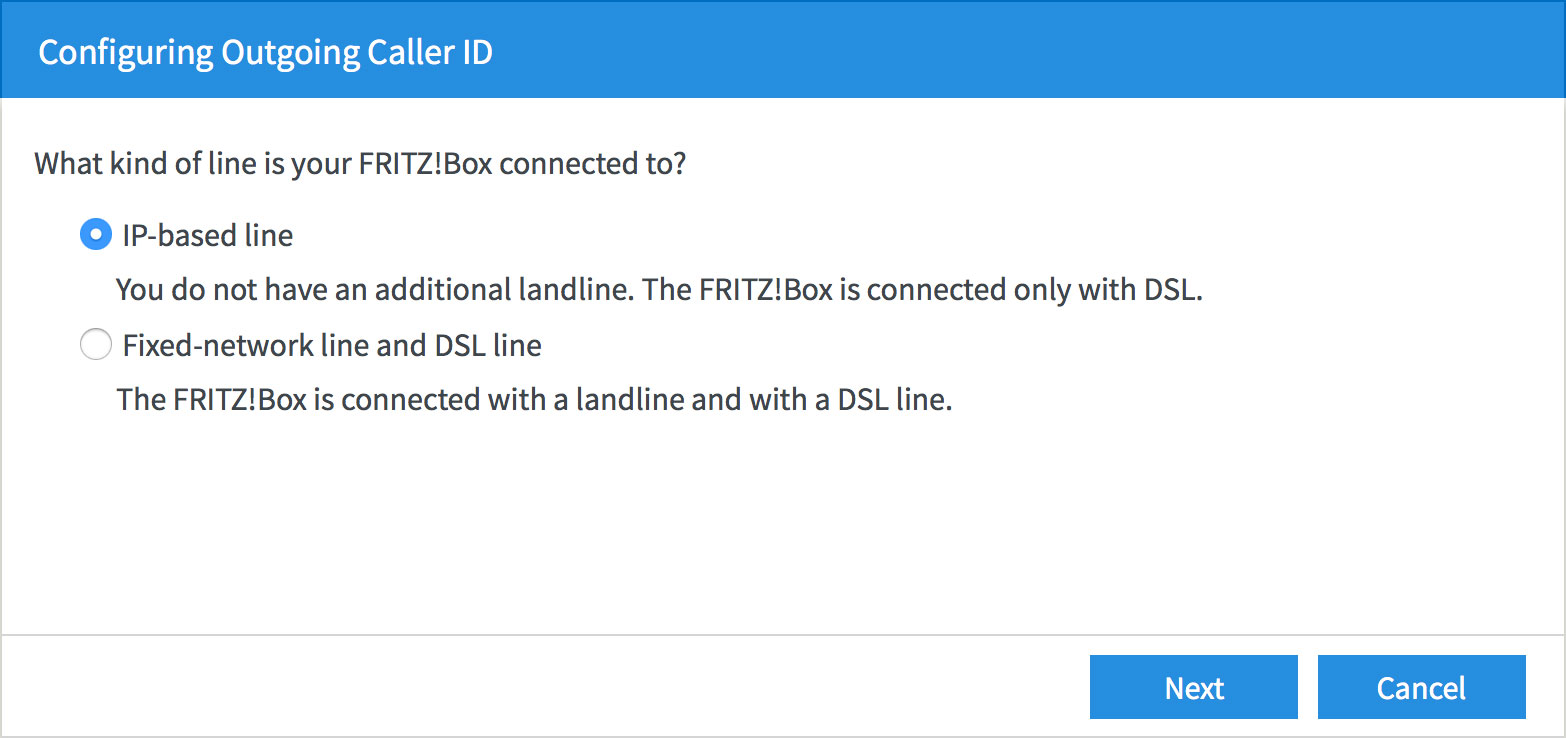 |
| Figure 17: Selecting the type of line that your FRITZ!Box is connected to |
Step 2
- The FRITZ!Box will ask for your NodePhone VoIP account details and settings.
- Set the Telephony provider to Other provider.
- Enter your NodePhone VoIP number into the Telephone Number for Registration and Internal Telephone Number in the FRITZ!Box fields.
Make sure that you enter your full phone number - including the area code - and that there are no spaces in the number (for example: 0812345678). - Scroll down the screen to see the rest of the options.
 |
| Figure 18: Entering your NodePhone VoIP connection settings |
- Enter your NodePhone VoIP number into the User name field.
Make sure that you enter your full phone number - including the area code - and that there are no spaces in the number (for example: 0812345678). - Enter your NodePhone VoIP password into the Password field.
- Enter sip.internode.on.net into the Registrar field.
- Do not enter anything into the Proxy server field.
- Make sure that Insert area code for outgoing calls is not selected.
- Do not change any other settings on this screen. Click Next to continue.
 |
| Figure 19: Entering your NodePhone VoIP connection settings |
Step 3
- The Saving Internet Telephone Numbers screen will appear.
- Confirm that your settings are correct, then click Next to continue.
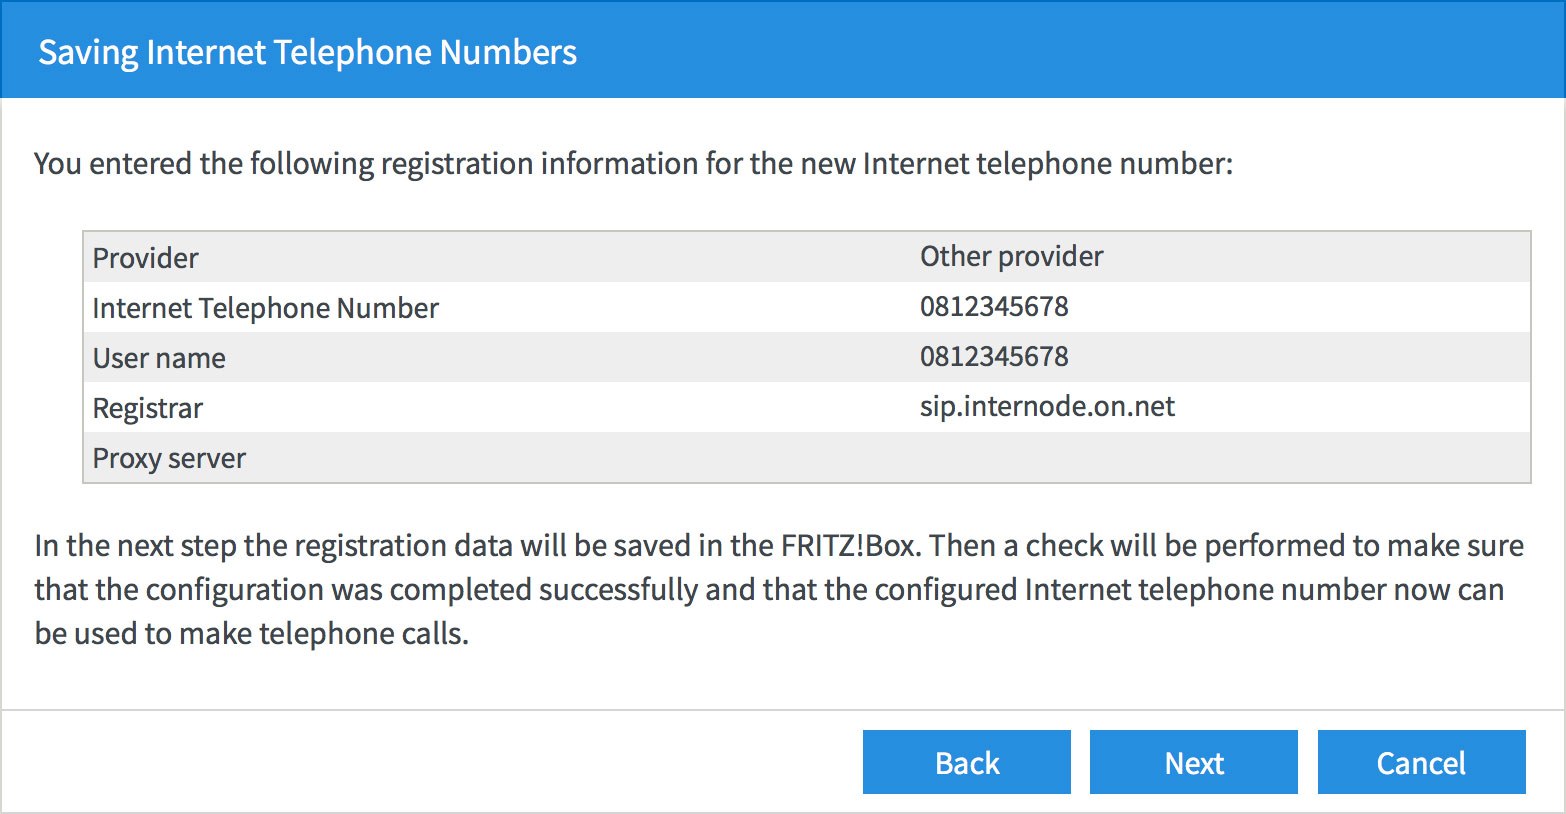 |
| Figure 20: Confirming your NodePhone VoIP settings |
Step 4
- The FRITZ!Box will then test your NodePhone connection. If successful, click Next.
 |
| Figure 21: A successful NodePhone VoIP test |
Step 5
- The NodePhone VoIP setup has been completed, and you should see your NodePhone account listed on the screen.
- If you do not need to set up WiFi, select Cancel.
- If you would like to set up your WiFi, click Next to go on to Wireless network setup.
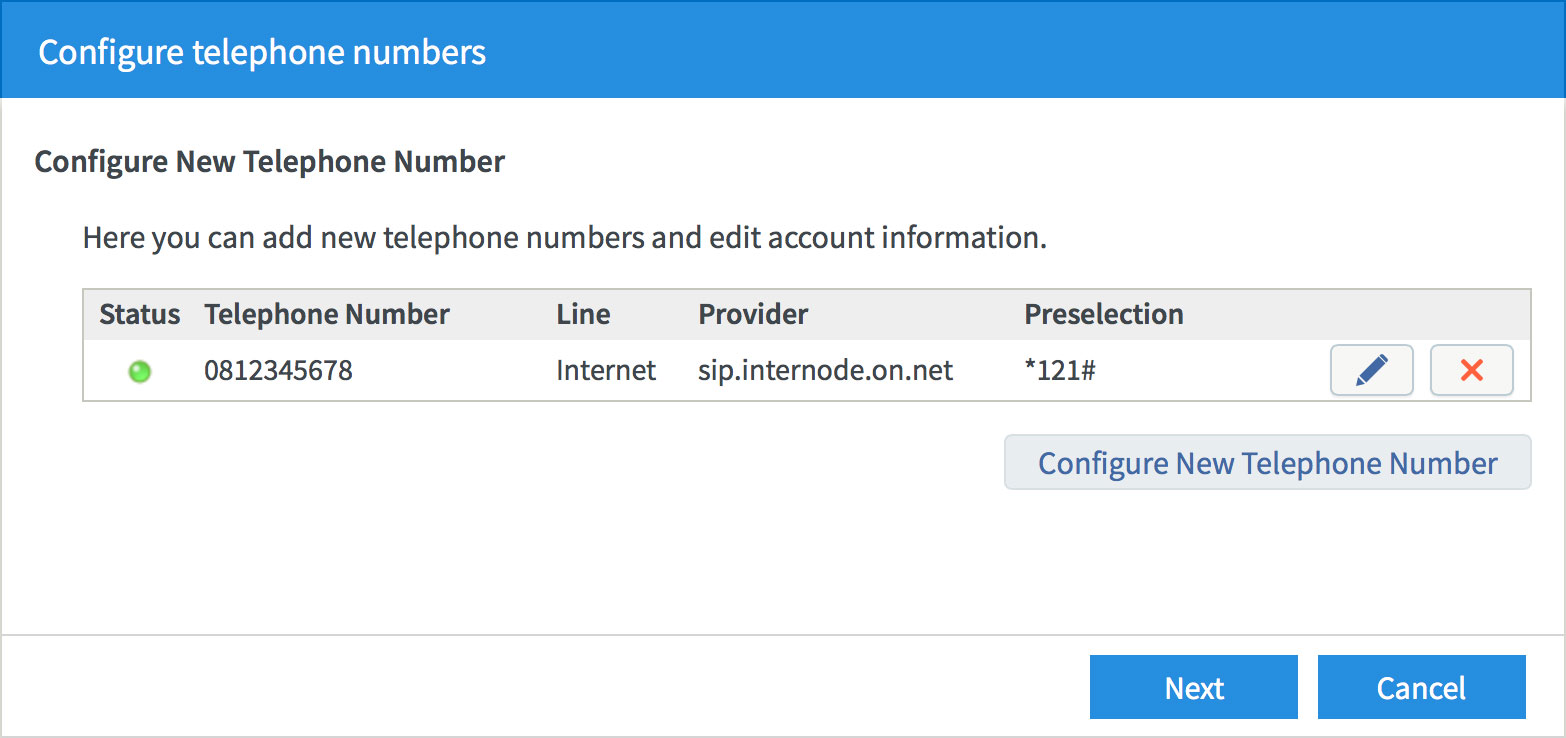 |
| Figure 22: The end of the NodePhone VoIP part of the wizard |
WiFi Setup Wizard
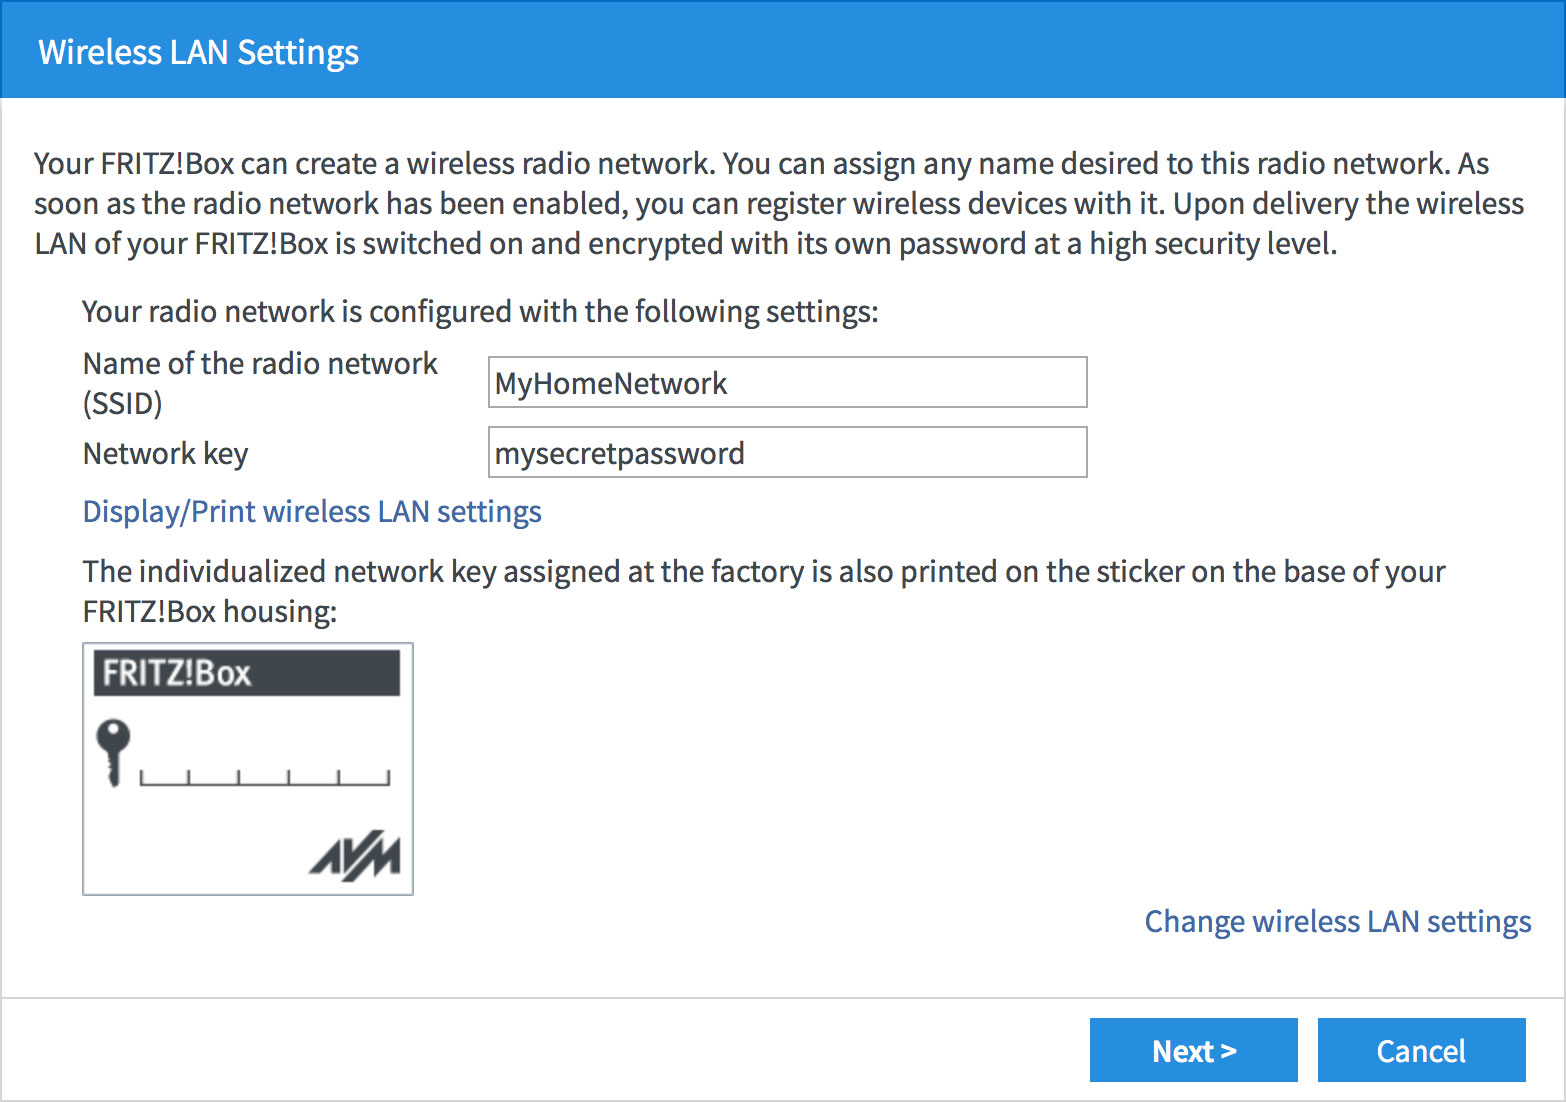
Step 1
- The FRITZ!Box will display the current Wireless LAN settings. This will include the default password (which is also found on the bottom of your FRITZ!Box). If you're happy to use this password, simply click Finish wizards to complete the wizard.
- If you would like to change your WiFi settings, click Change wireless LAN settings at the bottom-right of the screen.
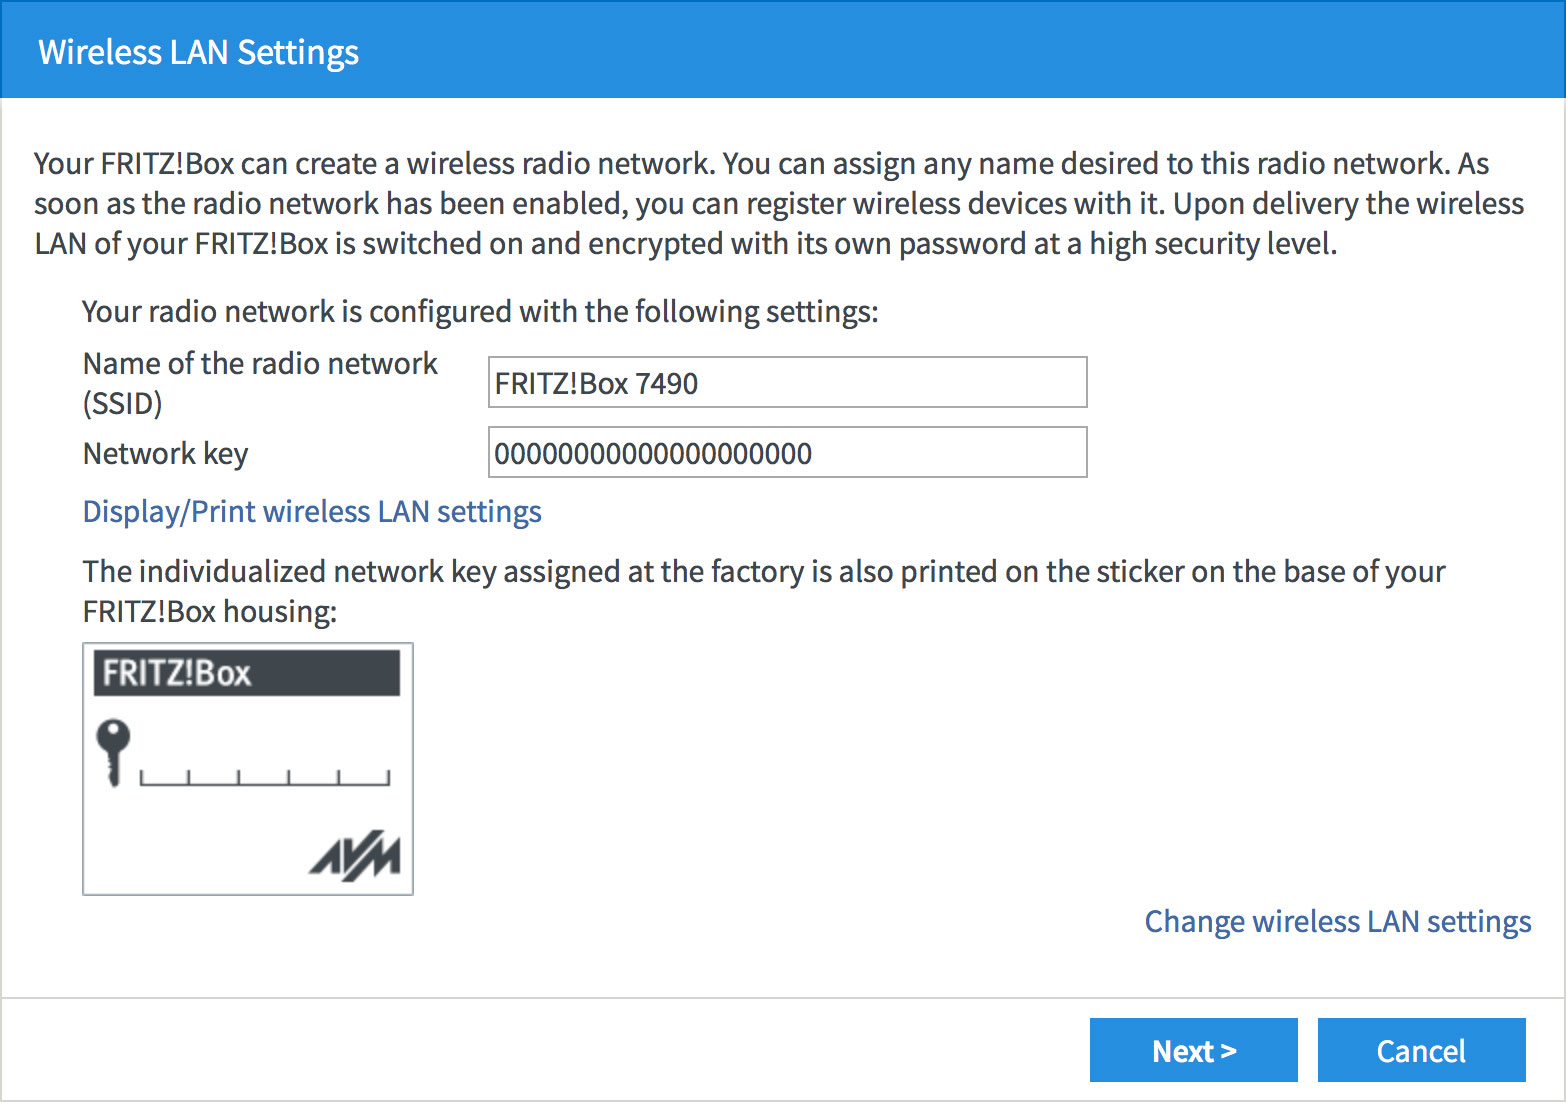 |
| Figure 23: The default WiFi settings |
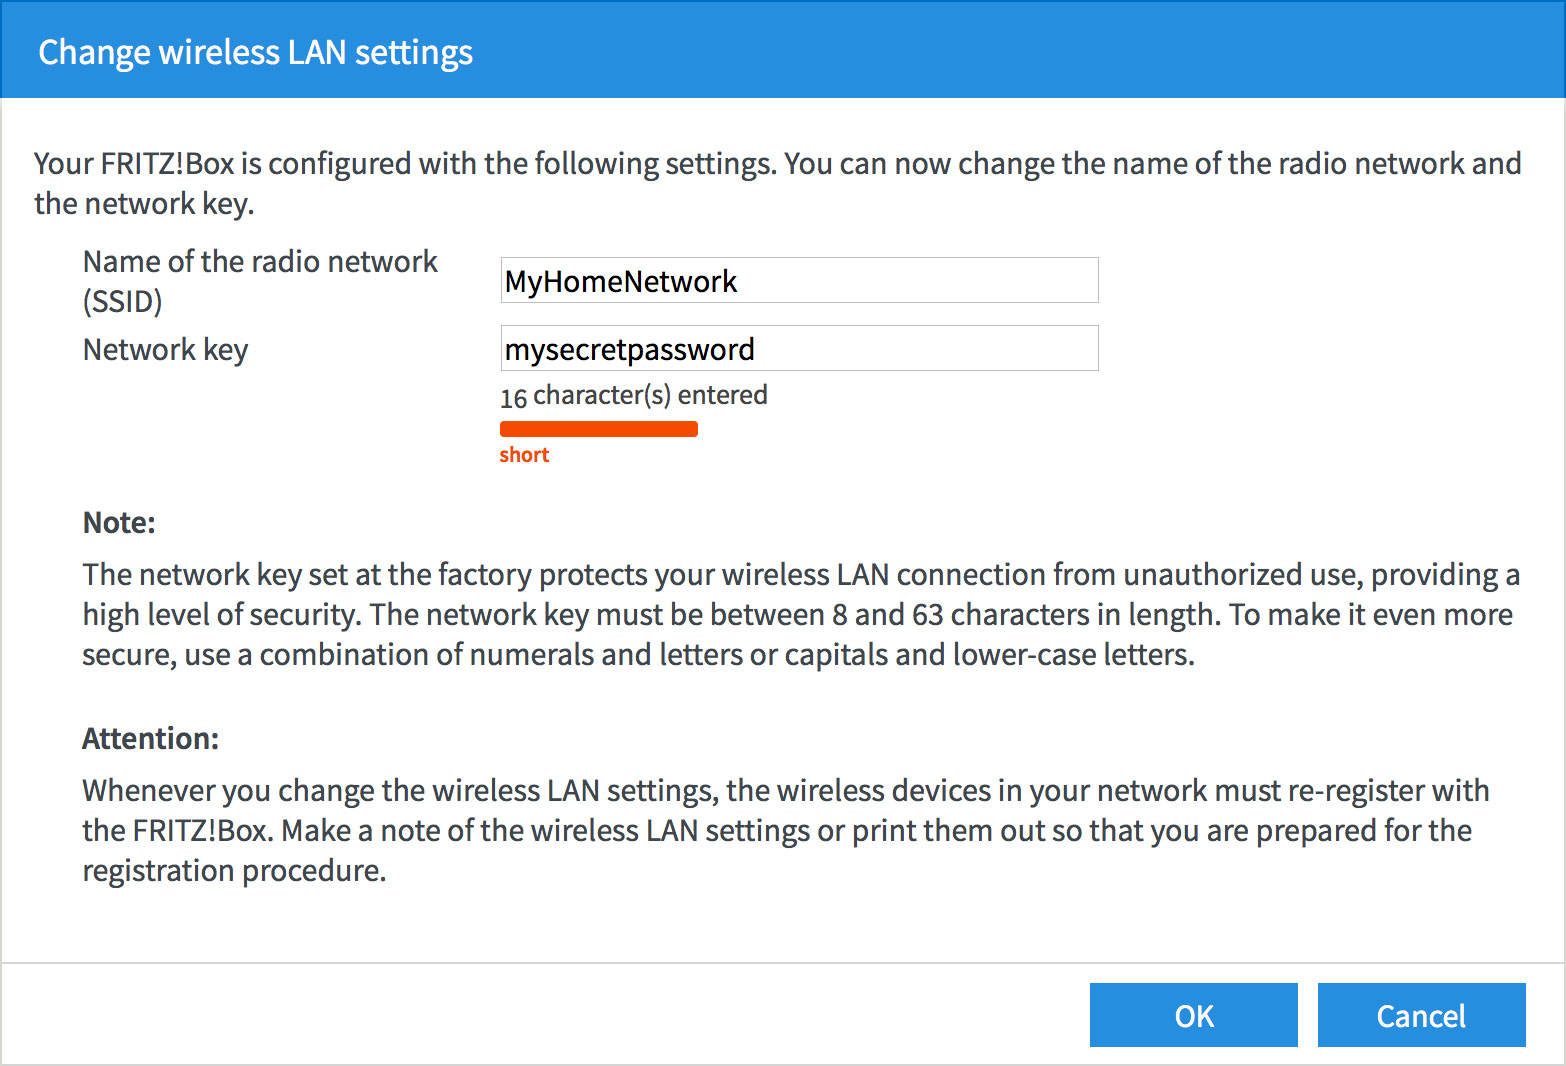
Step 2
- If you've chosen to change your WiFi settings, the FRITZ!Box will allow you to change your network name and password.
- Create a name for your wireless network and enter this into the field labelled Name of the radio network (SSID).
Creating a network name (SSID)
Your network name is used to identify your wireless network. This is particularly useful if there are other wireless networks nearby.
Because your network name will be visible outside of your home or office, the name should be recognisable but should not use any personal or service details.
- Bad Network Names:
BloggsFamily, JoeBloggs, 123JamesStreet, Internode, default, your Internode username, your router's name. - Good Network Names:
MyNetwork, HomeWireless, Homestead, Cookie Monster (be creative!)
- Create a password that will be used to access your wireless network. Type your new password into the Network Key field.
Creating a Pre-shared Key (Wireless Password)
A Pre-shared key prevents people you don't know from accessing your wireless network. When you connect your computers to your wireless network, you will be asked for the pre-shared key. If someone tries to connect without the pre-shared key, they will be unable to connect.
Your pre-shared key:
- must have a minimum of 8 alphanumeric characters
- is case sensitive
- should never be the same as your Internode password
We recommend you create a complex password for your pre-shared key.
 |
| Figure 24: Changing your WiFi settings |
- Once you're happy with your network name and password, click OK to save your settings.
Step 3
- The FRITZ!Box will confirm your new network name and password.
- If you're happy with the settings, click Next to continue the wizard.
 |
| Figure 25: Confirming your WiFi settings |
Checking Firmware
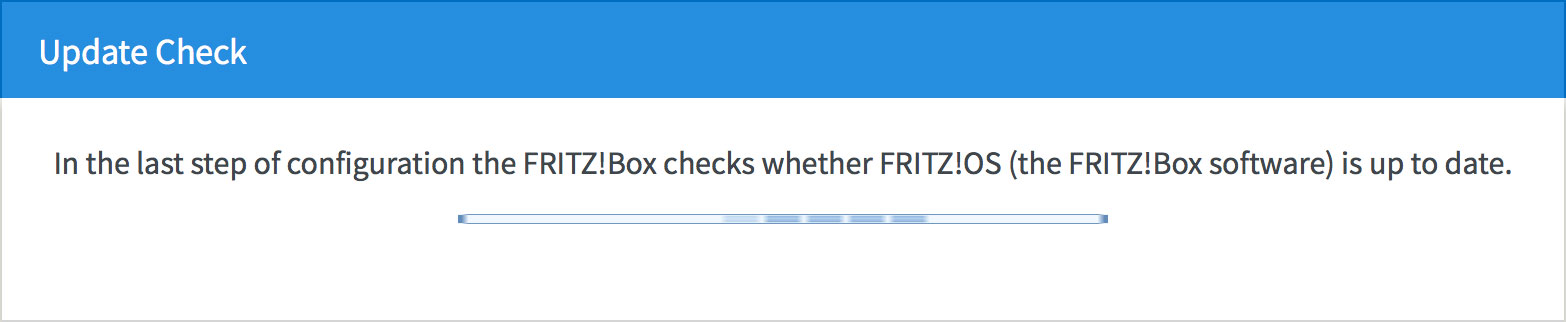
Step 1
- The FRITZ!Box will check for firmware before finishing the wizard.
 |
| Figure 26: Checking for updated firmware |
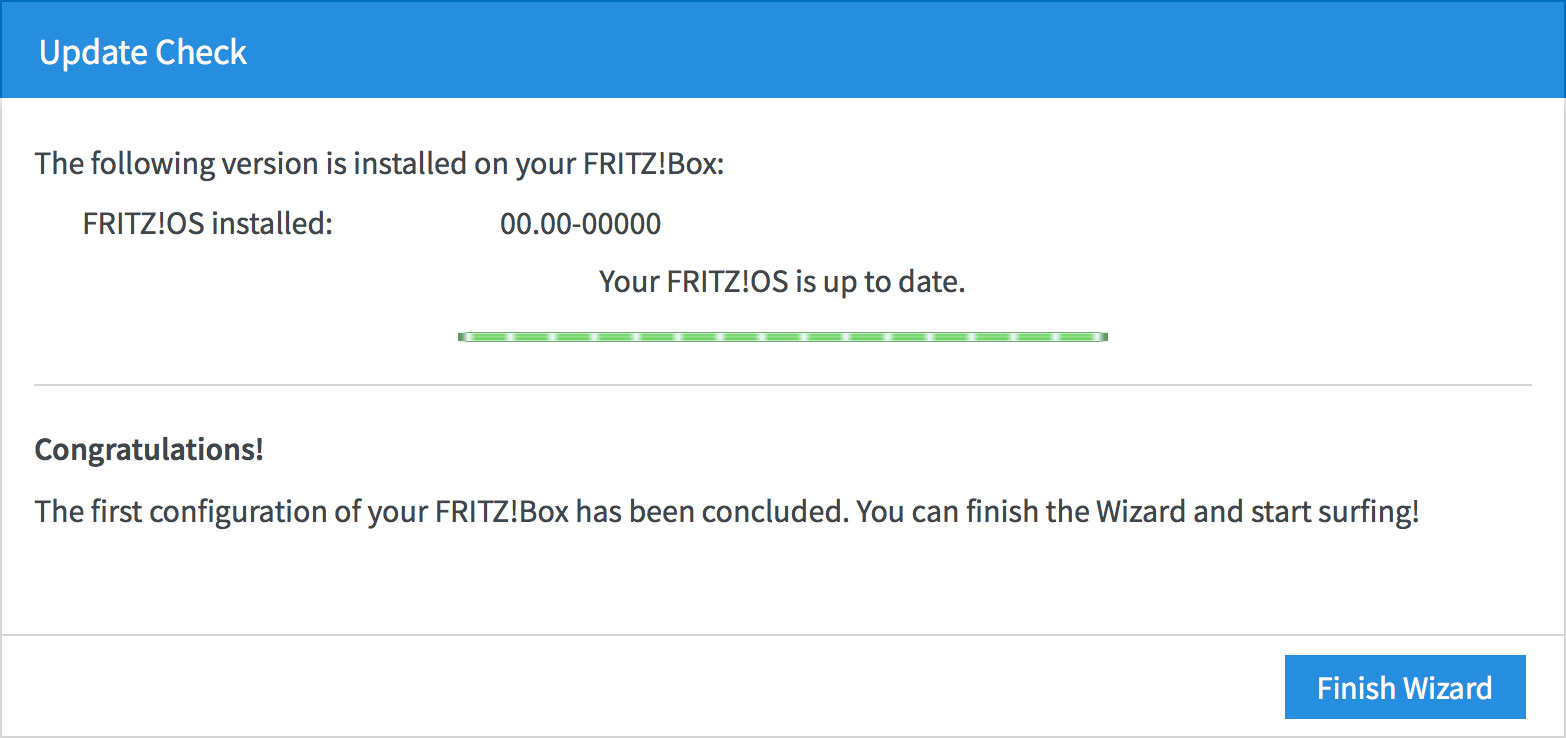
Step 2
- If there is new firmware, the FRITZ!Box will download and install it.
- If not, you will see the following screen. Click Finish Wizard to complete setup.
 |
| Figure 26: Firmware up to date |
Congratulations! You have successfully configured your ADSL, NodePhone VoIP, and WiFi settings on your FRITZ!Box router.
To connect your computer to the network, please refer to the following guides:
- Connecting a Windows computer to a wireless network
- Connecting a Macintosh computer to a wireless network
Further Assistance
If you're looking to also set up your NodePhone VoIP or Wireless service, please refer to our other guides:
If you are having trouble setting up your router, or would like to clarify some of the steps, please contact our Support Team.
If you'd like to set up a Virtual Private Network (VPN), or other advanced features, please see these pages on AVM International's website:
Please note that our Support Team cannot provide assistance with VPNs, Port Forwarding, or other advanced features.